If you write JavaScript you’re likely familiar with ES2015 and all the new language standards that were introduced. One such standard that has seen incredible popularity is destructuring assignment. The ability to “dive into” an array or object and reference something inside of it more directly. It usually goes something like this.
const response = {
 status: 200,
 data: {}
}

// instead of response.data we get...
const {data} = response //now data references the data object directly


const objectList = [ { key: 'value' }, { key: 'value' }, { key: 'value' } ]

// instead of objectList[0], objectList[1], etc we get...
const [obj, obj1, obj2] = objectList // now each object can be referenced directly
However, destructuring assignment is such a powerful piece of syntax that many developers, even those who have been using it since it was first released, forget some of the things it can do. In this post, we’ll go through five real-world examples for both object and array destructuring, sometimes both! And just for fun, I’ll include a wonky example I came across just the other day.
1. Nested Destructuring
Being able to access a top-level key inside an object, or the first element of an array is powerful, but it’s also somewhat limiting. It only removes one level of complexity and we still end up with a series of dots or [0] references to access what we’re really after.
As it turns out, destructuring can work beyond the top level. And there can be valid reasons for doing so. Take this example of an object response from an HTTP request. We want to go beyond the data object and access just the user. So long as we know the keys we’re looking for, that isn’t a problem.
const response = {
 status: 200,
 data: {
 user: {
 name: 'Rachel',
 title: 'Editor in Chief'
 },
 account: {},
 company: 'Smashing Magazine'
 }
}

const {data: {user}} = response // user is { name: 'Rachel', title: 'Editor in Chief'}
The same can be done with nested arrays. In this case, you don’t need to know the key since there is none. What you need to know is the position of what you’re looking for. You’ll need to provide a reference variable (or comma placeholder) for each element up and until the one you’re looking for (we’ll get to that later). The variable can be named anything since it is not attempting to match a value inside the array.
Keep in mind that these features should be used judiciously, as with any tool. Recognize your use case and the audience of your code base. Consider readability and ease of change down the road. For example, if you’re looking to access a subarray only, perhaps a map would be a better fit.
2. Object And Array Destructuring
Objects and arrays are common data structures. So common, in fact, that one often appears inside the other. Beyond nested destructuring, we can access nested properties even if they are in a different type of data structure than the external one we’re accessing.
The opposite use case is also valid. An array of objects.
const users = [{name: 'rachel', title: 'editor'}, {name: 'laurie', title: 'contributor'}]

const [{name}] = users // name is 'rachel'
As it turns out, we have a bit of a problem in this example. We can only access the name of the first user; otherwise, we’ll attempt to use ‘name’ to reference two different strings, which is invalid. Our next destructuring scenario should sort this out.
3. Aliases
As we saw in the above example (when we have repeating keys inside different objects that we want to pull out), we can’t do so in the “typical” way. Variable names can’t repeat within the same scope (that’s the simplest way of explaining it, it’s obviously more complicated than that).
const users = [{name: 'rachel', title: 'editor'}, {name: 'laurie', title: 'contributor'}]

const [{name: rachel}, {name: laurie}] = users // rachel is 'rachel' and laurie is 'laurie'
Aliasing is only applicable to objects. That’s because arrays can use any variable name the developer chooses, instead of having to match an existing object key.
4. Default Values
Destructuring often assumes that the value it’s referencing is there, but what if it isn’t? It’s never pleasant to litter code with undefined values. That’s when default values come in handy.
Let’s look at how they work for objects.
const user = {name: 'Luke', organization: 'Acme Publishing'}
const {name='Brian', role='publisher'} = user
// name is Luke
// role is publisher
If the referenced key already has a value, the default is ignored. If the key does not exist in the object, then the default is used.
As with the objects example, if the value exists then the default is ignored. Looking at the above example you may notice that we’re destructuring more elements than exist in the array. What about destructuring fewer elements?
5. Ignoring Values
One of the best parts of destructuring is that it allows you to access values that are part of a larger data structure. This includes isolating those values and ignoring the rest of the content, if you so choose.
We actually saw an example of this earlier, but let’s isolate the concept we’re talking about.
const user = {name: 'Luke', organization: 'Acme Publishing'}
const {name} = user
// name is Luke
In this example, we never destructure organization and that’s perfectly ok. It’s still available for reference inside the user object, like so.
user.organization
For arrays, there are actually two ways to “ignore” elements. In the objects example we’re specifically referencing internal values by using the associated key name. When arrays are destructured, the variable name is assigned by position. Let’s start with ignoring elements at the end of the array.
const roleCounts = [2, 100, 100000]
const [editors, contributors] = roleCounts
// editors is 2
// contributors is 100
We destructure the first and second elements in the array and the rest are irrelevant. But how about later elements? If it’s position based, don’t we have to destructure each element up until we hit the one we want?
As it turns out, we do not. Instead, we use commas to imply the existence of those elements, but without reference variables they’re ignored.
const roleCounts = [2, 100, 100000]
const [, contributors, readers] = roleCounts
// contributors is 100
// readers is 100000
And we can do both at the same time. Skipping elements wherever we want by using the comma placeholder. And again, as with the object example, the “ignored” elements are still available for reference within the roleCounts array.
Wonky Example
The power and versatility of destructuring also means you can do some truly bizarre things. Whether they’ll come in handy or not is hard to say, but worth knowing it’s an option!
One such example is that you can use destructuring to make shallow copies.
const obj = {key: 'value', arr: [1,2,3,4]}
const {arr, arr: copy} = obj
// arr and copy are both [1,2,3,4]
Another thing destructuring can be used for is dereferencing.
const obj = {node: {example: 'thing'}}
const {node, node: {example}} = obj
// node is { example: 'thing' }
// example is 'thing'
As always, readability is of the utmost importance and all of these examples should be used judicially. But knowing all of your options helps you pick the best one.
Conclusion
JavaScript is full of complex objects and arrays. Whether it’s the response from an HTTP request, or static data sets, being able to access the embedded content efficiently is important. Using destructuring assignment is a great way to do that. It not only handles multiple levels of nesting, but it allows for focused access and provides defaults in the case of undefined references.
Even if you’ve used destructuring for years, there are so many details hidden in the spec. I hope that this article acted as a reminder of the tools the language gives you. Next time you’re writing code, maybe one of them will come in handy!
I’m one of those people who can’t live without their Bash terminal. This sole fact has made it difficult for me to do frontend work on Windows. I work at Microsoft and I’m on a Mac. It wasn’t until the new Surface hardware line came out a few years ago that I realized: I gotta have one of those.
So I got one. A Surface Book 2 running Windows 10 to be exact. I’m drafting this article on it right now. And what of my sweet, sweet Bash prompt? Well, I brought it along with me, of course.
In this article, I’m going to take an in-depth look at how new technology in Windows 10 enables you to run a full Linux terminal on Windows. I’ll also show you my amazing terminal setup (which was named “best ever” by “me”) and how you too can set up your very own Windows/Linux development machine.
If you’ve been craving some of that Surface hardware but can’t live without a Linux terminal, you’ve come to the right place.
Note: At the time of this writing, a lot of the items in this article will require you to use or switch to “preview” or “insiders” builds of various items, including Windows. Most of these things will be in the main Windows build at some point in the future.
Windows Subsystem For Linux (WSL)
The Windows Subsystem for Linux, or, “WSL” is what enables you to run Linux on Windows. But what exactly is this mad science?
The WSL, in its current incarnation, is a translation layer that converts Linux system calls into Windows system calls. Linux runs on top of the WSL. That means that in order to get Linux on Windows, you need to do three things:
Enable the WSL,
Install Linux,
Always include three items in a list.
As it turns out, that translation layer is a tad on the slow side — kind of like me trying to remember if I need splice or slice. This is especially true when the WSL is reading and writing to the file system. That’s kind of a big problem for web developers since any proper npm install will copy thousands of files to your machine. I mean, I don’t know about you, but I’m not going to left-pad my own strings.
Version 2 of the WSL is a different story. It is considerably faster than the current version because it leverages a virtualization core in Windows instead of using the translation layer. When I say it’s “considerably faster”, I mean way, way faster. Like as fast as me Googling “splice vs slice”.
For that reason, I’m going to show how to install the WSL 2. At the time of writing, that is going to require you to be on the “Insider” build of Windows.
First things first: follow this short guide to enable the WSL on Windows 10 and check your Windows version number.
Once you have it installed, hit the Windows key and type “windows insider”. Then choose “Windows Insider Program Settings”.
You’ll have a couple of different options as to which “ring” you want to be on. A lot of people I know are on the fast ring. I’m a cautious guy, though. When I was a kid I would go down the slide at the playground on my stomach holding on to the sides. Which is why I stay on the slow ring. I’ve been on it for several months now, and I find it to be no more disruptive or unstable than regular Windows.
It’s a good option if you want the WSL 2, but you don’t want to die on the slide.
Next, you need to enable the “Virtual Machine Platform” feature in Windows, which is required by the WSL version 2. To get to this screen, press the Windows key and type “windows features”. Then select “Turn Windows Features on or off”. Select “Virtual Machine Platform”. The “Windows Subsystem for Linux” option should already be enabled.
Now that the WSL is enabled, you can install Linux. You do this, ironically enough, directly from the Windows Store. Only in 2019 would I suggest that you “install Linux from the Windows store”.
There are several different distributions to choose from, but Ubuntu is going to be the most supported across all the tools we’ll configure later on — including VS Code. All of the instructions that come from here on out with assume a Ubuntu install. If you install a different distro, all bets are off.
Search for “Ubuntu” from the Windows Store. There will be three to choose from: Ubuntu, Ubuntu 18.04, and Ubuntu 16.04. Ubuntu really likes that 04 minor version number, don’t they?
The “Ubuntu” distro (the first one in this screenshot) is the “meta version”, or rather a placeholder that just points to the latest version. As of right now, that’s 18.04.
I went with the meta version because later on I’ll show you how to browse the Linux file system with Windows Explorer and it’s kinda messy to have “Ubuntu 18.04” as a drive name vs just “Ubuntu”.
This install is pretty quick depending on your internet connection. It’s only about 215 megabytes, but I am on a gigabit connection over here and how do you know if someone is on a gigabit connection? Don’t worry, they’ll tell you.
Once installed, you’ll now have an “Ubuntu” app in your start menu.
If you’re showing version 1, you’ll need to execute the --set-version command and specify the name of the instance (Ubuntu) and the version you want (2).
This is going to take a bit, depending on how much meat your machine has. Mine took “some minutes” give or take. When it’s done, you’ll be on the latest and greatest version of the WSL.
The Is Your Brain On Linux… On Windows.
Linux is not Windows. WSL is not a bash prompt on top of a Windows operating system. It is a full operating system unto itself with its own folder structure and installed applications. If you install Node with the Windows installer, typing node in Linux is going to fail because Node is not installed in Linux. It’s installed on Windows.
The true magic of the WSL, though, lies in the way it seamlessly connects Windows and Linux so that they appear as one file system on your machine.
File And Folder Navigation
By default, the Ubuntu terminal drops you into your Linux home directory (or /home/your-user-name). You can move onto the Windows side by going to /mnt/c.
Notice that some permissions are denied here. I would have to right-click the Ubuntu icon and click “Run as Administrator” to get access to these files. This how Windows does elevated permissions. There is no sudo on Windows.
Launching Applications
You can launch any Windows application from the Ubuntu terminal. For instance, I can open Windows Explorer from the Unbuntu terminal.
This also works in reverse. You can execute any application installed on the Linux side. Here I am executing “fortune” installed in Linux from the Windows command line. (Because it ain’t a proper Linux install without random, meaningless fortunes.)
Two different operating systems. Two different file systems. Two different sets of installed applications. See how this could get confusing?
In order to keep everything straight, I recommend that you keep all your JavaScript development files and tools installed on the Linux side of things. That said, the ability to move between Windows and Linux and access files from both systems is the core magic of the WSL. Don’t forget it, cause it’s what makes this whole setup better than just a standard Linux box.
Setting Up Your Development Environment
From here on out, I’m going to give you a list of opinionated items for what I think makes a killer Linux on Windows setup. Just remember: my opinions are just that. Opinions. It just happens that just like all my opinions, they are 100% correct.
Getting A Better Terminal
Yes, you got a terminal when you installed Ubuntu. It’s actually the Windows Console connected to your Linux distro. It’s not a bad console. You can resize it, turn on copy/paste (in settings). But you can’t do things like tabs or open new windows. Just like a lot of people use replacement terminal programs on Mac (I use Hyper), there are other options for Windows as well. The Awesome WSL list on Github contains a pretty exhaustive list.
Those are all fine emulators, but there is a new option that is built by people who know Windows pretty well.
Microsoft has been working on a new application called “Windows Terminal”.
Windows Terminal can be installed from the Windows Store and is currently in preview mode. I’ve been using it for quite a while now, and it has enough features and is stable enough for me to give it a full-throated endorsement.
The new Windows Terminal features a full tab interface, copy/paste, multiple profiles, transparent backgrounds, background images — even transparent background images. It’s a field day if you like to customize your terminal, and I came to win this sack race.
Here is my current terminal. We’ll take a walk through some of the important tweaks here.
Windows terminal is quite customizable. Clicking the “⌄” arrow at the top left (next to the “+” sign) gives you access to “Settings”. This will open a JSON file.
Bind Copy/Paste
At the top of the file are all of the key bindings. The first thing that I did was map “copy” to Ctrl + C and paste to Ctrl + V. How else am I going to copy and paste in commands from Stack Overflow that I don’t understand?
The problem is that Ctrl + C is already mapped to SIGINT, or the Interrupt/kill command on Linux. There are a lot of terminals out there for Windows that handle this by mapping Copy/Paste to Ctrl + Shift + C and Ctrl + Shift + V respectively. The problem is that copy/paste is Ctrl + C / Ctrl + V every other single place in Windows. I just kept pressing Ctrl + C in the terminal over and over again trying to copy things. I could not stop doing it.
The Windows terminal handles this differently. If you have text highlighted and you press Ctrl + C, it will copy the text. If there is a running process, it still sends the SIGINT command down and interrupts it. The means that you can safely map Ctrl + C / Ctrl + V to Copy/Paste in the Windows Terminal and it won’t interfere with your ability to interrupt processes.
Whoever thought Copy/Paste could cause so much heartache?
Change The Default Profile
The default profile is what comes up when a new tab is opened. By default, that’s Powershell. You’ll want to scroll down and find the Linux profile. This is the one that opens wsl.exe -d Ubuntu. Copy its GUID and paste it into the defaultProfile setting.
I’ve moved these two settings so they are right next to each other to make it easier to see:
I like my background to be a dark solid color with a flat-ish logo in the right-hand corner. I do this because I want the logo to be bright and visible, but not in the way of the text. This one I made myself, but there is a great collection of flat images to pick from at Simple Desktops.
The background is set with the backgroundImage property:
You’ll also notice a setting called “acrylic”. This is what enables you to adjust the opacity of the background. If you have a solid background color, this is pretty straightforward.
For my theme, transparency makes everything look muted, so I keep the useAcrylic set to false.
Change The Font
The team building the Windows Terminal is also working on a new font called “Cascadia Code”. It’s not available as of the time of this writing, so you get the default Windows font instead.
The default font in the Windows Terminal is “Consolas”. This is the same font that the Windows command line uses. If you want that true Ubuntu feel, Chris Hoffman points out how you can install the official Ubuntu Mono font.
Here’s a before and after so you can see the difference:
They look pretty similar; the main difference being in the spacing of Ubuntu Mono which makes the terminal just a bit tighter and cleaner.
Color Schemes
The color schemes are all located at the bottom of the settings file. I copied the “Campbell” color scheme as a baseline. I try to match colors with their names, but I’m not afraid to go rogue either. I’ll map “#ffffff” to “blue” — I don’t even care.
If you like this particular scheme which I’ve named “Earth”, I’ve put together this gist so you don’t have to manually copy all of this mess out of a screenshot.
Note: The color previews come by virtue of the “Color Highlight” extension for VS Code.
Change The Default Starting Directory
By default, the WSL profile drops you into your home directory on the Windows side. Based on the setup that I am recommending in this article, it would be preferable to be dropped into your Linux home folder instead. To do that, alter the startingDirectory setting in your “Ubuntu” profile:
If you’ve never used Zsh and Oh-My-Zsh before, you’re in for a real treat. Zsh (or “Z Shell”) is a replacement shell for Linux. It expands on the basic capabilities of Bash, including implied directory switching (no need to type cd), better-theming support, better prompts, and much more.
To install Zsh, grab it with the apt package manager, which comes out of the box with your Linux install:
sudo apt install zsh
Install oh-my-zsh using curl. Oh-my-zsh is a set of configurations for zsh that improve the shell experience even further with plugins, themes and a myriad of keyboard shortcuts.
sh -c "$(curl -fsSL https://raw.githubusercontent.com/robbyrussell/oh-my-zsh/master/tools/install.sh)"
Then it will ask you if you want to change your default shell to Zsh. You do, so answer in the affirmative and you are now up and running with Zsh and Oh-My-Zsh.
Note: If you pick a theme like “agnoster” which requires glyphs, you’ll need a powerline infused version of Ubuntu Mono that has… glyphs. Otherwise, your terminal will just be full of weird characters like you mashed your face on the keyboard. Nerd Fonts offers one that seems to work pretty well.
Now you can do things like changing directories just by entering the directory name. No cd required. Wanna go back up a directory? Just do a ... You don’t even have to type the whole directory name, just type the first few letters and hit tab. Zsh will give you a list of all of the files/directories that match your search and you can tab through them.
As a web developer, you’re probably going to want to install Node. I suppose you don’t have to install Node to do web development, but it sure feels like it in 2019!
Your first instinct might be to install node with apt, which you can do, but you would regret it for two reasons:
The version of Node on apt is dolorously out of date;
You should install Node with a version manager so that you don’t run into permissions issues.
The best way to solve both of these issues is to install nvm (Node Version Manager). Since you’ve installed zsh, you can just add the nvm plugin in your zshrc file and zsh takes care of the rest.
First, install the plugin by cloning in the zsh-nvm repo. (Don’t worry, Git comes standard on your Ubuntu install.)
Now you can install node with nvm. It makes it easy to install multiple side-by-side versions of node, and switch between them effortlessly. Also, no permissions errors when you do global npm installs!
nvm install --lts
I recommend this over the standard nvm install because the plugin gives you the ability to easily upgrade nvm. This is kind of a pain with the standard “curl” install. It’s one command with the plugin.
nvm upgrade
Utilize Auto Suggestions
One of my very favorite plugins for zsh is zsh-autosuggestions. It remembers things you have typed in the terminal before, and then recognizes them when you start to type them again as well as “auto-suggests” the line you might need. This plugin has come in handy more times than I can remember — specifically when it comes to long CLI commands that I have used in the past, but can’t ever remember.
Then add it to your zsh plugins and source the zshrc file:
nano ~/.zshrc

# In the .zshrc file
plugins(zsh-nvm zsh-autosuggestions git)

source ~/.zshrc
The plugin reads your zsh history, so start typing some command you’ve typed before and watch the magic. Try typing the first part of that long clone command above.
If you hit ↹, it will autocomplete the command. If you keep hitting ↹, it will cycle through any of the commands in your history that could be a match.
Important Keyboard Shortcuts
There are a few terminal shortcuts that I use all the time. I find this with all of my tools — including VS Code. Trying to learn all the shortcuts is a waste of time because you won’t use them enough to remember them.
Here are a few that I use regularly:
Terminal Shortcut
What does it do?
Ctrl + L
This clears the terminal and puts you back to the top. It’s the equivilant of typing “clear”.
Ctrl + U
This clears out the current line only.
Ctrl + A
Sends the cursor to the beginning of the command line.
Ctrl + E
Move to the end of the line.
Ctrl + K
Delete all the characters after the cursor.
That’s it! Everything else I’ve probably learned and then forgotten because it never gets any use.
Configuring Git(Hub/Lab/Whatevs)
Git comes on Ubuntu, so there is no install required. You can follow the instructions at your source control hoster of choice to get your ssh keys created and working.
Note that in the Github instructions, it tells you to use the “copy” utility to copy your ssh key. Ubuntu has the “xcopy” command, but it’s not going to work here because there is no interop between the Linux and Windows in terms of a clipboard.
Instead, you can just use the Windows Clipboard executable and call it directly from the terminal. You need to get the text first with cat, and then pipe that to the Windows clipboard.
cat ~/.ssh/id_rsa.pub | clip.exe
The Github docs tell you to make sure that the ssh-agent is running. It’s not. You’ll see this when you try and add your key to the agent:
You can start the agent, but the next time you reboot Windows or the WSL is stopped, you’ll have to start it again. This is because there is no initialization system in the WSL. There is no systemd or another process that starts all of your services when the WSL starts. WSL is still in preview, and the team is working on a solution for this.
In the meantime, believe it or not, there’s a zsh plugin for this, too. It’s called ssh-agent, and it comes installed with oh-my-zsh, so all you need to do is reference it in the .zshrc file.
zsh-nvm zsh-autosuggestions ssh-agent git
This will start the ssh-agent automatically if it’s not running the first time that you fire up the WSL. The downside is that it’s going to ask you for your passphrase every time WSL is started fresh. That means essentially anytime you reboot your computer.
The WSL has no GUI, so you can’t install a visual tool like VS Code. That needs to be installed on the Windows side. This presents a problem because you have a program running on the Windows side accessing files on the Linux side, and this can result in all manor of quirks and “permission denied” issues. As a general rule of thumb, Microsoft recommends that you not alter files in the WSL side with Windows programs.
To resolve this, there is an extension for VS Code called “Remote WSL”. This extension is made by Microsoft, and allows you to develop within the WSL, but from inside of VS Code.
Once the extension is installed, you can attach VS Code directly to the Ubuntu side by opening the Command Palette (Ctrl + Shift + P) and select “Remote-WSL: New Window”.
This opens a new instance of VS Code that allows you to work as if you were fully on the Linux side of things. Doing “File/Open” browses the Ubuntu file system instead of the Windows one.
The integrated terminal in VS Code opens your beautifully customized zsh setup. Everything “just works” like it should when you have the Remote WSL extension installed.
If you open code from your terminal with code ., VS Code will automatically detect that it was opened from the WSL, and will auto-attach the Remote WSL extension.
VS Code Extensions With Remote WSL
The Remote WSL extension for VS Code works by setting up a little server on the Linux side, and then connecting to that from VS Code on the Windows side. That being the case, the extensions that you have installed in VS Code won’t automatically show up when you open a project from the WSL.
For instance, I have a Vue project open in VS Code. Even though I have all of the right Vue extensions installed for syntax highlighting, formatting and the like, VS Code acts like it’s never seen a .vue file before.
All of the extensions that you have installed can be enabled in the WSL. Just find the extension that you want in the WSL, and click the “Install in WSL” button.
All of the extensions installed in the WSL will show up in their own section in the Extensions Explorer view. If you have a lot of extensions, it could be slightly annoying to install each one individually. If you want to just install every extension you’ve got in the WSL, click the little cloud-download icon at the top of the ‘Local – Installed’ section.
This is already an opinionated article, so here’s one you didn’t ask for on how I think you should structure your projects on your file system.
I keep all my projects on the Linux side. I don’t put my projects in “My Documents” and then try and work with them from the WSL. My brain can’t handle that.
I create a folder called /dev that I put in the root of my /home folder in Linux. Inside that folder, I create another one that is the same name as my Github repo: /burkeholland. That folder is where all of my projects go — even the ones that aren’t pushed to Github.
If I clone a repo from a different Github account (e.g. “microsoft”), I’ll create a new folder in “dev” called /microsoft. I then clone the repo into a folder inside of that.
Basically, I’m mimicking the same structure as source control on my local machine. I find it far easier to reason about where projects are and what repos they are attached to just by virtue of their location. It’s simple, but it is highly effective at helping me keep everything organized. And I need all the help I can get.
You might do this for a number of different reasons. For instance, just today I needed a Chrome extension that isn’t in the web store. So I cloned the repo in WSL, then navigated to it as an “Unpacked Extension” and loaded it into Edge.
One thing that I do with some frequency in Linux is to open the directory that contains a file directly from the terminal. You can do this in the WSL, too, by directly calling explorer.exe. For instance, this command opens the current directory in Windows Explorer.
$ explorer.exe .
This command is a bit cumbersome though. On Linux, it’s just open .. We can make that same magic by creating an alias in the ~/.zshrc.
alias open="explorer.exe"
Docker
When I said all tooling should be on the Linux side, I meant that. That includes Docker.
This is where the rubber really starts to meet the road. What we need here is Docker, running inside of Linux running inside of Windows. It’s a bit of a Russian Nesting Doll when you write it down in a blog post. In reality, it’s pretty straightforward.
You’ll need the correct version of Docker for Windows. As of the time of this writing, that’s the WSL 2 Tech Preview.
When you run the installer, it will ask you if you want to use Windows containers instead of Linux containers. You definitely do. Otherwise, you won’t get the option to run Docker in the WSL.
After you start the service, you can use Docker within the WSL just as you would expect to be able to. Running Docker in the WSL provides a pretty big performance boost, as well as a boost in cold start time on containers.
Might I also recommend that you install the Docker extension for VS Code? It puts a visual interface on your Docker setup and generally just makes it easier to work with Docker because you don’t have to remember all those command-line flags and options.
Get More Bash On Windows
At this point, you should get the idea about how to put Bash on Windows, and how it works once you get it there. You can customize your terminal endlessly and there are all sorts of rad programs that you can add in to do things like automatically set PATH variables, create aliases, get an ASCII cow in your terminal, and much more.
Running Bash on Windows opened up an entirely new universe for me. I’m able to combine Windows which I love for the productivity side, and Linux which I depend on as a developer. Best of all, I can build apps for both platforms now with one machine.
Further Reading
You can read more about Bash on Windows over here:
(This is a sponsored article.) Time-to-market plays a crucial role in modern web design. Most product teams want to minimize the time required to go from the idea to a ready-to-use product without sacrificing the quality of the design along the way.
When it comes to creating a website, teams often use a few different tools: one tool for graphics and visual design, another for prototyping, and another for coding. Webflow attempts to simplify the process of web design by enabling you to design and develop at the same time.
Typical Problems That Web Designers Face
It’s important to start with understanding what challenges web design teams face when they create websites:
A disconnection between visual design and coding.
Visual designers create mocks/prototypes in a visual tool (like Sketch) and hand them off to developers who need to code them. It creates an extra round of back-and-forth since developers have to go through an extra iteration of coding.
It’s hard to code complex interactions (especially animated transitions).
Designers can introduce beautiful effects in hi-fi prototypes, but developers will have a hard time reproducing the same layout or effect in code.
Optimizing designs for various screens.
Your designs should be responsive right from the start.
What Is Webflow?
Webflow is an in-browser design tool that gives you the power to design, build, and launch responsive websites visually. It’s basically an all-in-one design platform that you can use to go from the initial idea to ready-to-use product.
Here are a few things that make Webflow different:
The visual design and code are not separated.
What you create in the visual editor is powered by HTML, CSS, and JavaScript.
It allows you to reuse CSS classes.
Once defined, you can use a class for any elements that should have the same styling or use it as a starting point for a variation (base class).
It is a platform and as such, it offers hosting plans.
For $12 per month, it allows you to connect a custom domain and host your HTML site. And for an additional $4 per month, you can use the Webflow CMS.
Building A One-Page Website Using Webflow
The best way to understand what the tool is capable of is to build a real product with it. For this review, I will use Webflow to create a simple landing page for a fictional smart speaker device.
Define The Structure Of The Future Page
While it’s possible to use Webflow to create a structure of your layout, it’s better to use another tool for that. Why? Because you need to experiment and try various approaches before finding the one that you think is the best. It’s better to use a sheet of paper or any prototyping tool to define the bones of your page.
It’s also crucial to have a clear understanding of what you’re trying to achieve. Find an example of what you want and sketch it on paper or in your favorite design tool.
Tip: You don’t need to create a high-fidelity design all of the time. In many cases, it’s possible to use lo-fi wireframes. The idea is to use a sketch/prototype as a reference when you work on your website.
For our website, we will need the following structure:
A hero section with a large product image, copy, and a call-to-action button.
A section with the benefits of using our product. We will use a zig-zag layout (this layout pairs images with text sections).
A section with quick voice commands which will provide a better sense of how to interact with a device.
A section with contact information. To make contact inquiries easier for visitors, we’ll provide a contact form instead of a regular email address.
Create A New Project In Webflow
When you open the Webflow dashboard for the first time, you immediately notice a funny illustration with a short but helpful line of text. It is an excellent example of an empty state that is used to guide users and create the right mood from the start. It’s hard to resist the temptation to click “New Project.”
When you click “New Project,” Webflow will offer you a few options to start with: a blank site, three common presets, and an impressive list of ready-to-use templates. Some of the templates that you find on this page are integrated with the CMS which means that you can create CMS-based content in Webflow.
Templates are great when you want to get up and running very quickly, but since our goal is to learn how to create the design ourselves, we will choose “Blank Site.”
As soon as you create a new project, we will see Webflow’s front-end design interface. Webflow provides a series of quick how-to videos. They are handy for anyone who’s using Webflow for the first time.
Once you’ve finished going through the introduction videos, you will see a blank canvas with menus on both sides of the canvas. The left panel contains elements that will help you define your layout’s structure and add functional elements. The right panel contains styling settings for the elements.
Let’s define the structure of our page first. The top left button with a plus (+) sign is used to add elements or symbols to the canvas. All we have to do to introduce an element/visual block is to drag the proper item to the canvas.
While elements should be familiar for anyone who builds websites, Symbols can still be a new concept for many people. Symbols are analogous to features of other popular design tools, like the components in Figma and XD. Symbols turn any element (including its children) into a reusable component. Anytime you change one instance of a Symbol, the other instances will update too. Symbols are great if you have something like a navigation menu that you want to reuse constantly through the site.
Webflow provides a few elements that allow us to define the structure of the layout:
Sections. Sections divide up distinct parts of your page. When we design a page, we usually tend to think in terms of sections. For instance, you can use Sections for a hero area, for a body area, and a footer area.
Grid, columns, div block, and containers are used to divide the areas within Sections.
Components. Some elements (e.g. navigation bar) are provided in ready-to-use components.
Let’s add a top menu using the premade component Navbar which contains three navigation options and placeholders for the site’s logo:
Let’s create a Symbol for our navigation menu so we can reuse it. We can do that by going to “Symbols” and clicking “Create New Symbol.” We will give it the name “Navigation.”
Notice that the section color turned to green. We also see how many times it’s used in a project (1 instance). Now when we need a menu on a newly created page, we can go to the Symbols panel and select a ready-to-use “Navigation.” If we decide to introduce a change to the Symbol (i.e., rename a menu option), all instances will have this change automatically.
Next, we need to define the structure of our hero section. Let’s use Grid for that. Webflow has a very powerful Grid editor that simplifies the process of creating the right grid — you can customize the number of columns and rows, as well as a gap between every cell. Webflow also supports nested grid structure, i.e. one grid inside the other. We will use a nested grid for a hero section: a parent grid will define the image, while the child grid will be used for the Heading, text paragraph, and call-to-action button.
Now let’s place the elements in the cells. We need to use Heading, Paragraph, Button, and Image elements. By default, the elements will automatically fill out the available cells as you drag and drop them into the grid.
While it’s possible to customize the styling for text and images and add real content instead of dummy placeholders, we will skip this step and move to the other parts of the layout: the zig-zag layout.
For this layout, we will use a 2×3 grid (2 columns × 3 rows) in which every cell that contains text will be divided into 3 rows. We can easily create the first cell with a 3-row grid, but when it comes to using the same structure for the third cell of the master grid, we have a problem. Since Webflow automatically fills the empty cells with a new element, it will try to apply the 3-row child grid to the third element. To change this behavior, we need to use Manual. After setting the grid selection to Manual, we will be able to create the correct layout.
Once we have all the required elements in place, we can create a vertical rhythm by adjusting the position of every item that we use. First, we need to adjust the spacing of elements in grids. Change the margin and paddings and Align self for the image in order to place it in the center of the cell.
Now it’s time to replace the dummy content with real content. To start adding images, we’ll need to click on the gear icon for the Image element and select the image of our choice.
Webflow provides a visual style for every element we use in our design. Let’s take a Heading section as an example: It’s possible to play with font color, font, weight, spacing, shadows, and other visual properties of this object. Here is what we will have when adding real copy and playing with font color.
Once we have a nice and clean hero section, we can add content to our zig-zag layout.
Notice that every time we style something, we give it a Selector (a class), so Webflow will know that the style should be applied specifically for this element. We can use the same class to style other elements. In our case, we need the same style for images, headings, descriptions, and links that we have in the zig-zag layout.
Applying the same “benefit” style for all images in the zig-zag section. (Large preview)
Webflow also allows creating combo classes — when one class is used as a base class, and another class is used to override the styling options of the base class. In the example below, we override the default font color of the Heading using the class “Zig-Heading-Second.” Combo classes can save you a lot of time because you won’t need to create a style from scratch.
Using a combo class for the Heading. The orange indicator is used to highlight the properties that were inherited from the base class. (Large preview)
Here is how our layout will look like after the changes:
Webflow provides a very helpful feature for aligning content named “guide overlay” which can be located in the left menu panel. When you enable the guide, you will see the elements that are breaking the grid.
After finishing with a zig-zag layout, we need to add information on voice commands in the Slider. Add a Heading section in a relevant slide and change the visual styling options of this object.
Last but not least, we need to add a contact form to our website. Let’s add a section right underneath of Slider.
There are two ways we can add a form to the page. First, Webflow has a special element for web forms called Form Block. A form created using Form Block has three elements: Name, Email Address, and a Submit button. For our form, we will need a Message field. We can easily create one by duplicating the element Email Address and renaming it. By default, the Form Block has 100% width alignment, meaning it will take the entire width of the container. We will use the Grid settings to adjust the form width.
Secondly, Webflow allows integrating custom code right in the page. It means that we can create a form in a tool like Typeform, copy the embed code it provides and place it to the component called Embed that we placed to the section. Note that embeds will only appear once the site has been published or exported — not while you’re designing the site.
Once all elements are in place, we need to optimize our design for mobile. Almost half of the users (globally) access websites on mobile. What you can do within Webflow is to resize the browser window so that you can see how your design looks like with different breakpoints.
Let’s change our view to Mobile by clicking on the Mobile – Portrait icon.
As you can see, the design looks bad on mobile. But it’s relatively easy to optimize the design using Webflow: It allows you to change the order of elements, the spacing between elements, as well as other visual settings to make the design look great on mobile.
After we’re done making changes to our design, we have two options: we can export the design and use it on our own web hosting (i.e., integrate it into your existing CMS) or we can use Webflow’s own hosting provided. If we decide to use the second option, we need to click the Publish button and select the relevant publishing options, i.e. either publish it on the webflow.io domain or on a custom domain.
If you decide to export the code, Webflow will prepare a full zip with HTML, CSS, and all the assets you’ve used to create your design. The exported code will help you build a solid foundation for your product.
Conclusion
Webflow is an excellent tool for building high-fidelity prototypes and inviting feedback from team members and stakeholders. People who will review your prototype won’t need to imagine how the finished product will behave and look — they can experience it instead!
The tool simplifies the transition from a prototype into a fully finished UI because you’re designing products with real code, as opposed to creating clickable mocks in Sketch or any other prototyping tool. You won’t waste time by using one piece of software to build prototypes and another to turning those prototypes into real products. Webflow solves this problem for you.
Machine learning often feels like it belongs to the realm of data scientists and Python developers. However, over the past couple of years, open-source frameworks have been created to make it more accessible in different programming languages, including JavaScript. In this article, we will use Tensorflow.js to explore the different possibilities of using machine learning in the browser through a few example projects.
What Is Machine Learning?
Before we start diving into some code, let’s talk briefly about what machine learning is as well as some core concepts and terminology.
Definition
A common definition is that it is the ability for computers to learn from data without being explicitly programmed.
If we compare it to traditional programming, it means that we let computers identify patterns in data and generate predictions without us having to tell it exactly what to look for.
Let’s take the example of fraud detection. There is no set criteria to know what makes a transaction fraudulent or not; frauds can be executed in any country, on any account, targeting any customer, at any time, and so on. It would be pretty much impossible to track all of this manually.
However, using previous data around fraudulent expenses gathered over the years, we can train a machine-learning algorithm to understand patterns in this data to generate a model that can be given any new transaction and predict the probability of it being fraud or not, without telling it exactly what to look for.
Core Concepts
To understand the following code samples, we need to cover a few common terms first.
Model
When you train a machine-learning algorithm with a dataset, the model is the output of this training process. It’s a bit like a function that takes new data as input and produces a prediction as output.
Labels And Features
Labels and features relate to the data that you feed an algorithm in the training process.
A label represents how you would classify each entry in your dataset and how you would label it. For example, if our dataset was a CSV file describing different animals, our labels could be words like “cat”, “dog” or “snake” (depending on what each animal represents).
Features on the other hand, are the characteristics of each entry in your data set. For our animals example, it could be things like “whiskers, meows”, “playful, barks”, “reptile, rampant”, and so on.
Using this, a machine-learning algorithm will be able to find some correlation between features and their label that it will use for future predictions.
Neural Networks
Neural networks are a set of machine-learning algorithms that try to mimic the way the brain works by using layers of artificial neurons.
We don’t need to go in-depth about how they work in this article, but if you want to learn more, here’s a really good video:
Now that we’ve defined a few terms commonly used in machine learning, let’s talk about what can be done using JavaScript and the Tensorflow.js framework.
Depending on the problem you are trying to solve, there might be a model already trained with a specific data set and for a specific purpose which you can leverage and import in your code.
For example, let’s say we are building a website to predict if an image is a picture of a cat. A popular image classification model is called MobileNet and is available as a pre-trained model with Tensorflow.js.
And finally, inside the script tag, we have the JavaScript code that loads the pre-trained MobileNet model and classifies the image found in the image tag. It returns an array of 3 predictions which are ordered by probability score (the first element being the best prediction).
And that’s it! This is the way you can use a pre-trained model in the browser with Tensorflow.js!
Note: If you want to have a look at what else the MobileNet model can classify, you can find a list of the different classes available on Github.
An important thing to know is that loading a pre-trained model in the browser can take some time (sometimes up to 10s) so you will probably want to preload or adapt your interface so that users are not impacted.
If you prefer using Tensorflow.js as a NPM module, you can do so by importing the module this way:
import * as mobilenet from '@tensorflow-models/mobilenet';
Feel free to play around with this example on CodeSandbox.
Now that we’ve seen how to use a pre-trained model, let’s look at the second feature available: transfer learning.
2. Transfer Learning
Transfer learning is the ability to combine a pre-trained model with custom training data. What this means is that you can leverage the functionality of a model and add your own samples without having to create everything from scratch.
For example, an algorithm has been trained with thousands of images to create an image classification model, and instead of creating your own, transfer learning allows you to combine new custom image samples with the pre-trained model to create a new image classifier. This feature makes it really fast and easy to have a more customized classifier.
To provide an example of what this would look like in code, let’s repurpose our previous example and modify it so we can classify new images.
Note: The end result is the experiment below that you can try live here.
Below are a few code samples of the most important part of this setup, but if you need to have a look at the whole code, you can find it on this CodeSandbox.
We still need to start by importing Tensorflow.js and MobileNet, but this time we also need to add a KNN (k-nearest neighbor) classifier:
The reason why we need a classifier is because (instead of only using the MobileNet module) we’re adding custom samples it has never seen before, so the KNN classifier will allow us to combine everything together and run predictions on the data combined.
Then, we can replace the image of the cat with a video tag to use images from the camera feed.
Now, let’s move to the JavaScript file where we’re going to start by setting up a few important variables:
// Number of classes to classify
const NUM_CLASSES = 2;
// Labels for our classes
const classes = ["Left", "Right"];
// Webcam Image size. Must be 227.
const IMAGE_SIZE = 227;
// K value for KNN
const TOPK = 10;

const video = document.getElementById("webcam");
In this particular example, we want to be able to classify the webcam input between our head tilting to the left or the right, so we need two classes labeled left and right.
The image size set to 227 is the size of the video element in pixels. Based on the Tensorflow.js examples, this value needs to be set to 227 to match the format of the data the MobileNet model was trained with. For it to be able to classify our new data, the latter needs to fit the same format.
If you really need it to be larger, it is possible but you will have to transform and resize the data before feeding it to the KNN classifier.
Then, we’re setting the value of K to 10. The K value in the KNN algorithm is important because it represents the number of instances that we take into account when determining the class of our new input.
In this case, the value of 10 means that, when predicting the label for some new data, we will look at the 10 nearest neighbors from the training data to determine how to classify our new input.
Finally, we’re getting the video element. For the logic, let’s start by loading the model and classifier:
Following that, let’s set up some button events to record our sample data:
setupButtonEvents() {
 for (let i = 0; i {
 this.training = i;
 this.recordSamples = true;
 };
 button.onmouseup = () => (this.training = -1);
 }
 }
Let’s write our function that will take the webcam images samples, reformat them and combine them with the MobileNet module:
// Get image data from video element
const image = tf.browser.fromPixels(video);

let logits;
// 'conv_preds' is the logits activation of MobileNet.
const infer = () => this.mobilenetModule.infer(image, "conv_preds");

// Train class if one of the buttons is held down
if (this.training != -1) {
 logits = infer();

 // Add current image to classifier
 this.knn.addExample(logits, this.training);
}
And finally, once we gathered some webcam images, we can test our predictions with the following code:
And finally, you can dispose of the webcam data as we don’t need it anymore:
// Dispose image when done
image.dispose();
if (logits != null) {
 logits.dispose();
}
Once again, if you want to have a look at the full code, you can find it in the CodeSandbox mentioned earlier.
3. Training A Model In The Browser
The last feature is to define, train and run a model entirely in the browser. To illustrate this, we’re going to build the classic example of recognizing Irises.
For this, we’ll create a neural network that can classify Irises in three categories: Setosa, Virginica, and Versicolor, based on an open-source dataset.
Before we start, here’s a link to the live demo and here’s the CodeSandbox if you want to play around with the full code.
At the core of every machine learning project is a dataset. One of the first step we need to undertake is to split this dataset into a training set and a test set.
The reason for this is that we’re going to use our training set to train our algorithm and our test set to check the accuracy of our predictions, to validate if our model is ready to be used or needs to be tweaked.
Note: To make it easier, I already split the training set and test set into two JSON files you can find in the CodeSanbox.
The training set contains 130 items and the test set 14. If you have a look at what this data looks like you’ll see something like this:
What we can see is four different features for the length and width of the sepal and petal, as well as a label for the species.
To be able to use this with Tensorflow.js, we need to shape this data into a format that the framework will understand, in this case, for the training data, it will be [130, 4] for 130 samples with four features per iris.
In the code sample above, we start by instantiating a sequential model, add an input and output layer.
The parameters you can see used inside (inputShape, activation, and units) are out of the scope of this post as they can vary depending on the model you are creating, the type of data used, and so on.
Once our model is ready, we can train it with our data:
async function train_data(){
 for(let i=0;i<15;i++){
 const res = await model.fit(trainingData, outputData,{epochs: 40});
 }
}

async function main() {
 await train_data();
 model.predict(testSet).print();
}
If this works well, you can start replacing the test data with custom user inputs.
Once we call our main function, the output of the prediction will look like one of these three options:
The prediction returns an array of three numbers representing the probability of the data belonging to one of the three classes. The number closest to 1 is the highest prediction.
For example, if the output of the classification is [0.0002, 0.9494, 0.0503], the second element of the array is the highest, so the model predicted that the new input is likely to be a Virginica.
And that’s it for a simple neural network in Tensorflow.js!
We only talked about a small dataset of Irises but if you want to move on to larger datasets or working with images, the steps will be the same:
Gathering the data;
Splitting between training and testing set;
Reformatting the data so Tensorflow.js can understand it;
Picking your algorithm;
Fitting the data;
Predicting.
If you want to save the model created to be able to load it in another application and predict new data, you can do so with the following line:
await model.save('file:///path/to/my-model'); // in Node.js
Note: For more options on how to save a model, have a look at this resource.
Limits
That’s it! We’ve just covered the three main features currently available using Tensorflow.js!
Before we finish, I think it is important to briefly mention some of the limits of using machine learning in the frontend.
1. Performance
Importing a pre-trained model from an external source can have a performance impact on your application. Some objects detection model, for example, are more than 10MB, which is significantly going to slow down your website. Make sure to think about your user experience and optimize the loading of your assets to improve your perceived performance.
2. Quality Of The Input Data
If you build a model from scratch, you’re going to have to gather your own data or find some open-source dataset.
Before doing any kind of data processing or trying different algorithms, make sure to check the quality of your input data. For example, if you are trying to build a sentiment analysis model to recognize emotions in pieces of text, make sure that the data you are using to train your model is accurate and diverse. If the quality of the data used is low, the output of your training will be useless.
3. Liability
Using an open-source pre-trained model can be very fast and effortless. However, it also means that you don’t always know how it was generated, what the dataset was made of, or even which algorithm was used. Some models are called “black boxes”, meaning that you don’t really know how they predicted a certain output.
Depending on what you are trying to build, this can be a problem. For example, if you are using a machine-learning model to help detect the probability of someone having cancer based on scan images, in case of false negative (the model predicted that a person didn’t have cancer when they actually did), there could be some real legal liability and you would have to be able to explain why the model made a certain prediction.
Summary
In conclusion, using JavaScript and frameworks like Tensorflow.js is a great way to get started and learn more about machine learning. Even though a production-ready application should probably be built in a language like Python, JavaScript makes it really accessible for developers to play around with the different features and get a better understanding of the fundamental concepts before eventually moving on and investing time into learning another language.
In this tutorial, we’ve only covered what was possible using Tensorflow.js, however, the ecosystem of other libraries and tools is growing. More specified frameworks are also available, allowing you to explore using machine learning with other domains such as music with Magenta.js, or predicting user navigation on a website using guess.js!
As tools get more performant, the possibilities of building machine learning-enabled applications in JavaScript are likely to be more and more exciting, and now is a good time to learn more about it, as the community is putting effort into making it accessible.
Further Resources
If you are interested in learning more, here are a few resources:
▶ Horrible Web Interfaces and How to Build Them — This entertaining talk from React Rally looks at a variety of ‘horrible’ Web-based interface approaches and the underlying technologies involved. I particularly like the ‘gravity’-based volume control.
New Course: ♿️ Accessibility in JavaScript Applications — Make innovative and inclusive JavaScript-powered web apps. You’ll learn to remove barriers and allow people with disabilities to use your modern JavaScript web applications in Marcy’s new course.
Frontend Masters sponsor
Speeding Up The Web with the Save-Data Header — The Save-Data header field is a request header that indicates a client’s preference for reduced data usage — it’s not particularly new, but this is a good look at what it can achieve.
Learn GraphQL in 2 Hours — Open-source tutorials for React, React Native, Vue, Angular, Android, iOS & Flutter developers that’ll take you just 2 hours to complete.
Hasura sponsor
The Making of an Animated Favicon — Dynamically changing the pixels in a favicon to display upload progress – A lot of effort here, but it’s a neat little detail.
This CSS pseudo-class can be utilised to highlight an entire form area when the user selects any of a form container’s input fields.
The example image below demonstrates this (you can also see it in action in this little CodePen demo). The user has selected the Name input, and the entire form is highlighted in green:
Using this property is simple enough — just append the :focus-within selector on to the element you wish to highlight. Then, when any of the elements descendants are bought into focused, the desired change will occur.
form:focus-within { background: #98FB98; }
Browser support for this currently sits at around 82% — IE, Edge and Samsung Internet are amonst those yet to implement support.
My Favorite CSS Hack — * { border: 1px solid red } is a classic ‘trick’ for debugging CSS and HTML issues by putting borders around every element. This tip takes a few extra steps, however, and helps you get a better overview, particularly with nested elements.
Gajus Kuizinas
How Web Content Can Affect Power Usage — Users spend a large proportion of their online time on mobile devices, or on untethered laptop computers. This post digs into factors that affect battery life, and how to make your pages more power efficient so that users can spend more time engaged with your content.
Benjamin Poulain and Simon Fraser (WebKit)
The Secret to Agile Transformation — Discover how to empower web teams to collaborate more effectively, increase the rate of iteration on your site, and drive business results. The secret? WebOps and web teams. Watch now to find out why.
In A Swipe At Chrome, Firefox Now Blocks Ad Trackers by Default — Firefox 69, as released this week (above), enables Enhanced Tracking Protection by default, which blocks cryptominers and certain types of third party cookies designed to track users for advertising purposes.
The Baseline Interpreter: A Faster JS Interpreter in Firefox 70 — JIT (Just-In-Time) compilation was once all the rage for speeding up JavaScript but a faster interpreter can result in significant performance improvements on modern workloads and here’s how it works.
Overflow and ‘Data Loss’ In CSS — By default, elements expand to fit the content within them, but if you want to specify sizes for elements, content could ‘overflow’ within then. This is controllable and Rachel looks at the options.
TOAST UI Grid 4.5: A Data Grid Control for the Web — This no-dependency TypeScript-based data grid component works down to IE9, works with many data types, has advanced sorting capabilities (which you can customize), and is easily re-themed.
NHN Entertainment
instant.page 2.0: Preload Link Target Pages ASAP — You include some JavaScript in your page and the browser will begin to preload the destination page the second someone clicks on a link. This can result in a slight, but noticeable, performance increase.
Can You Rotate the Mouse Cursor in CSS? — Not exactly, but there’s a very neat looking workaround to pulling off the same effect. The demo here is cool to look at, if a little disorienting.

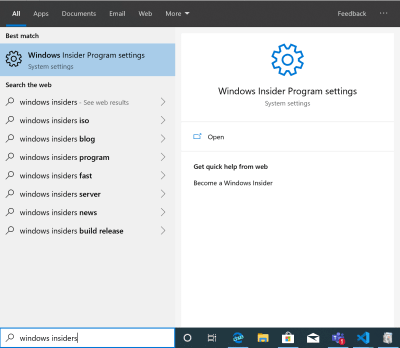


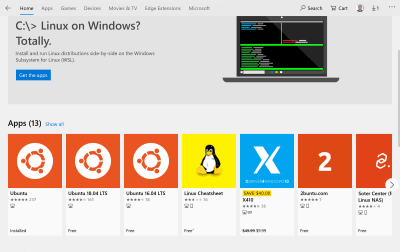
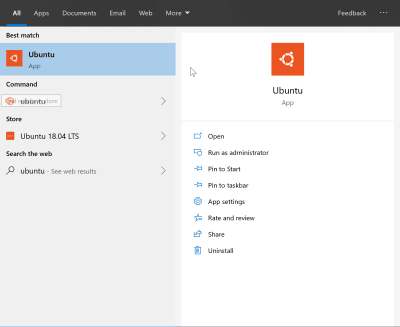
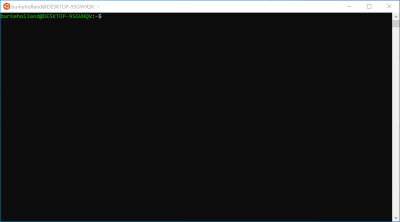
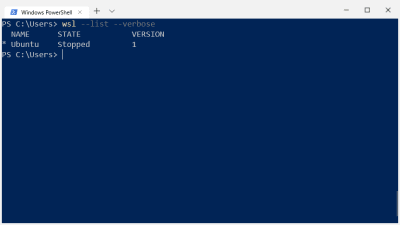
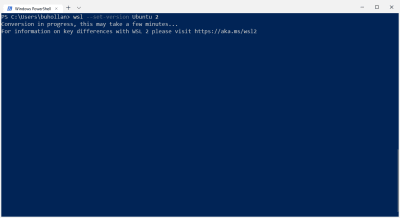

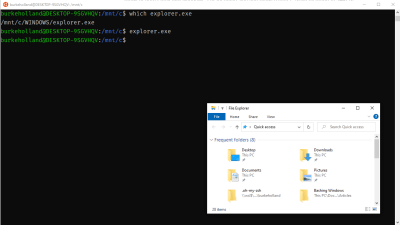
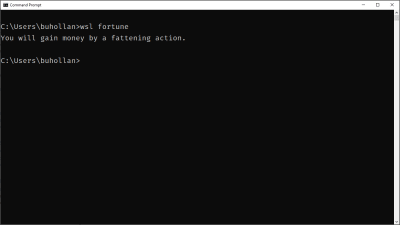
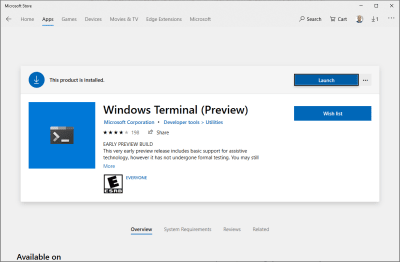


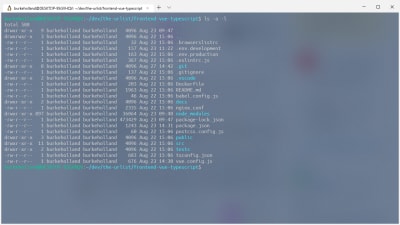
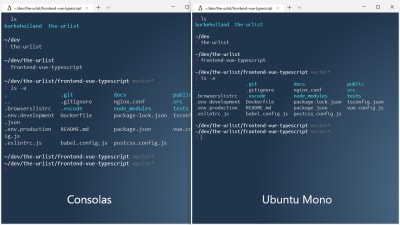
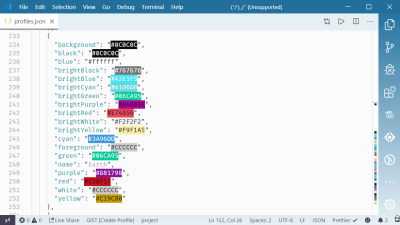
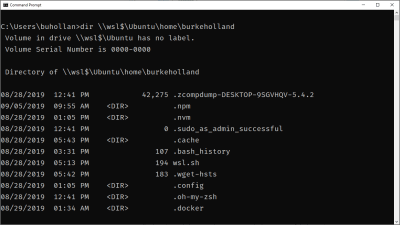
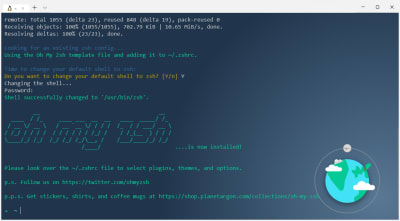

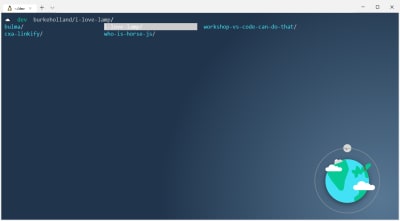
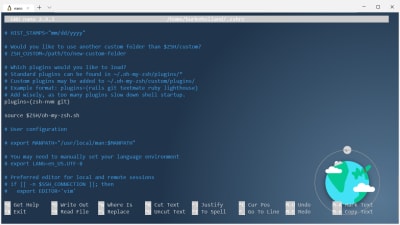
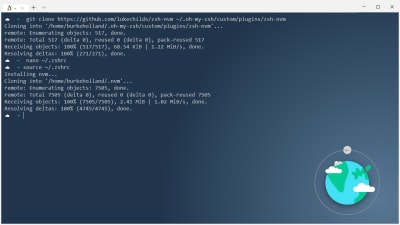
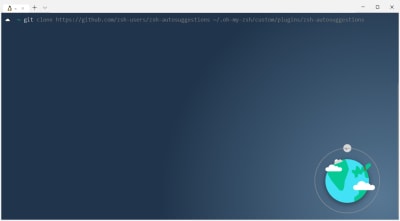


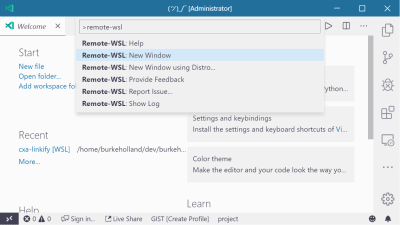
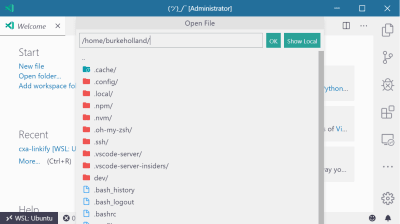

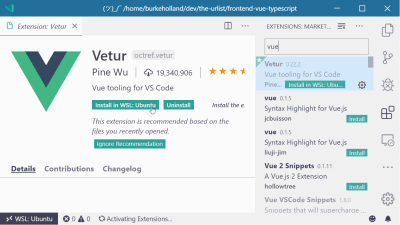
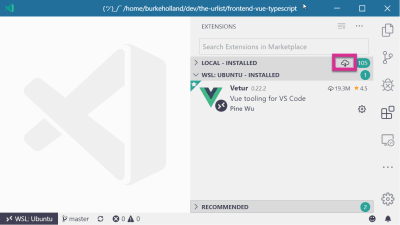
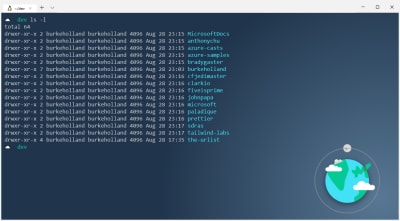
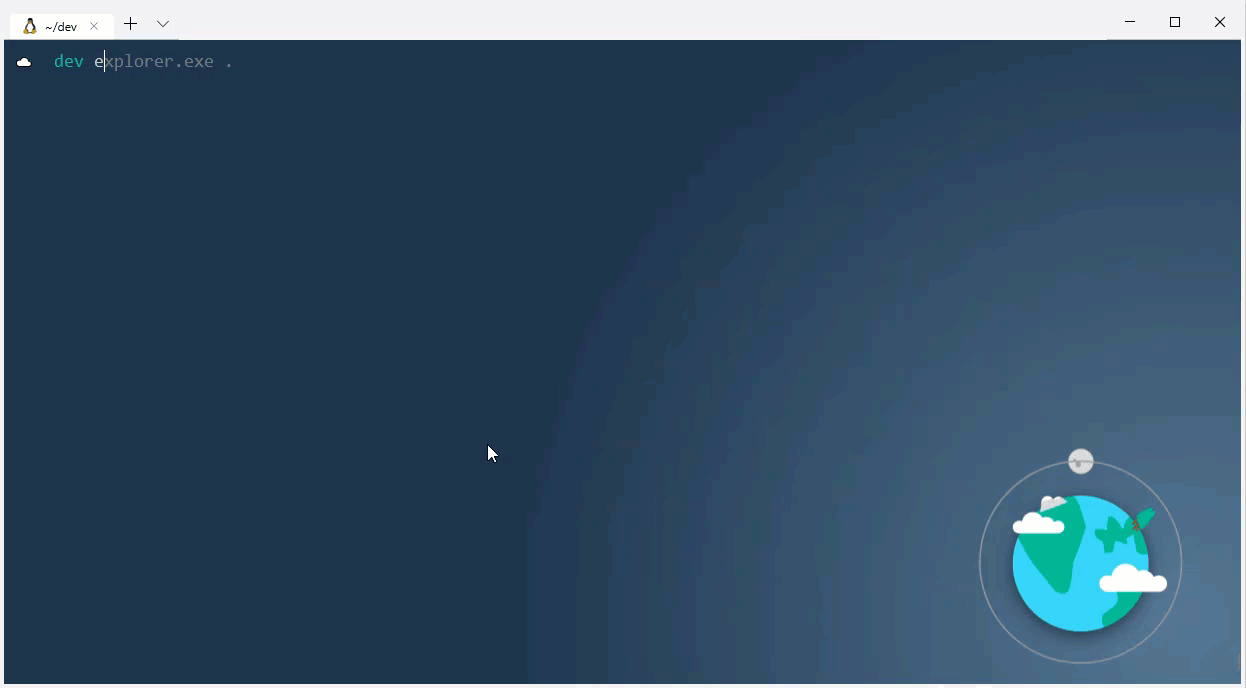
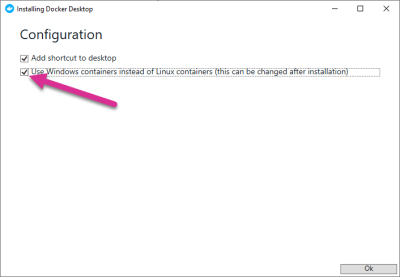
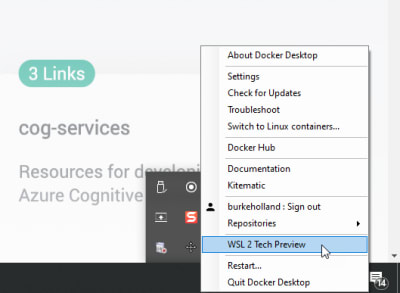


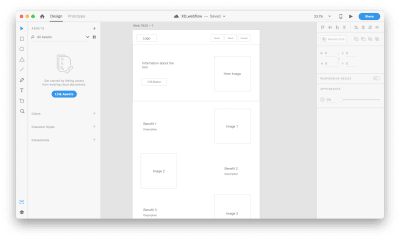


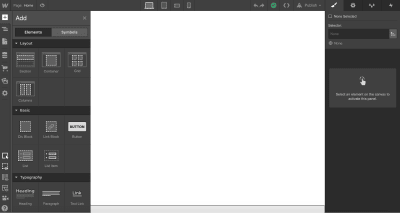
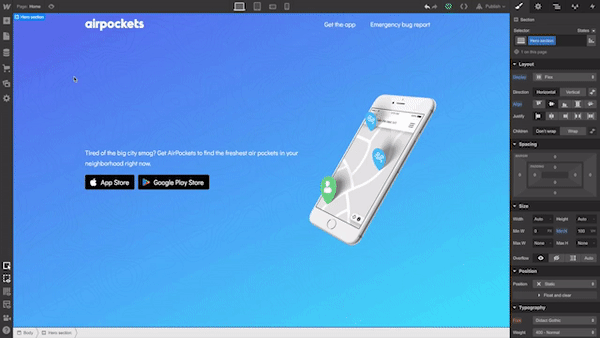

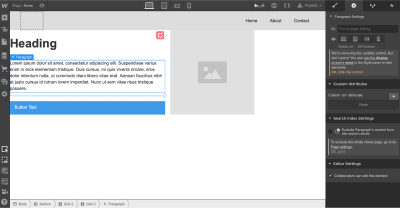

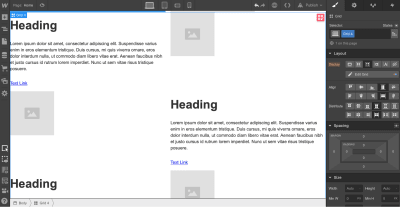
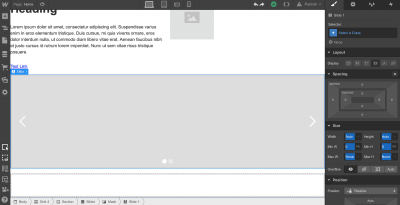


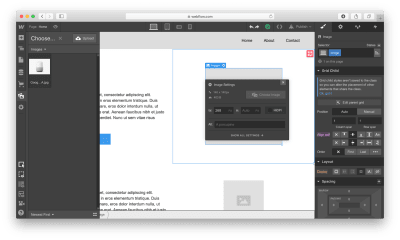


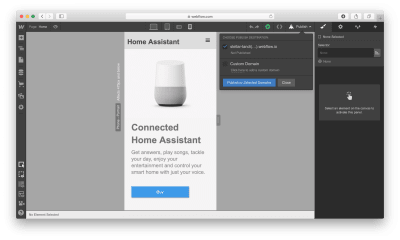


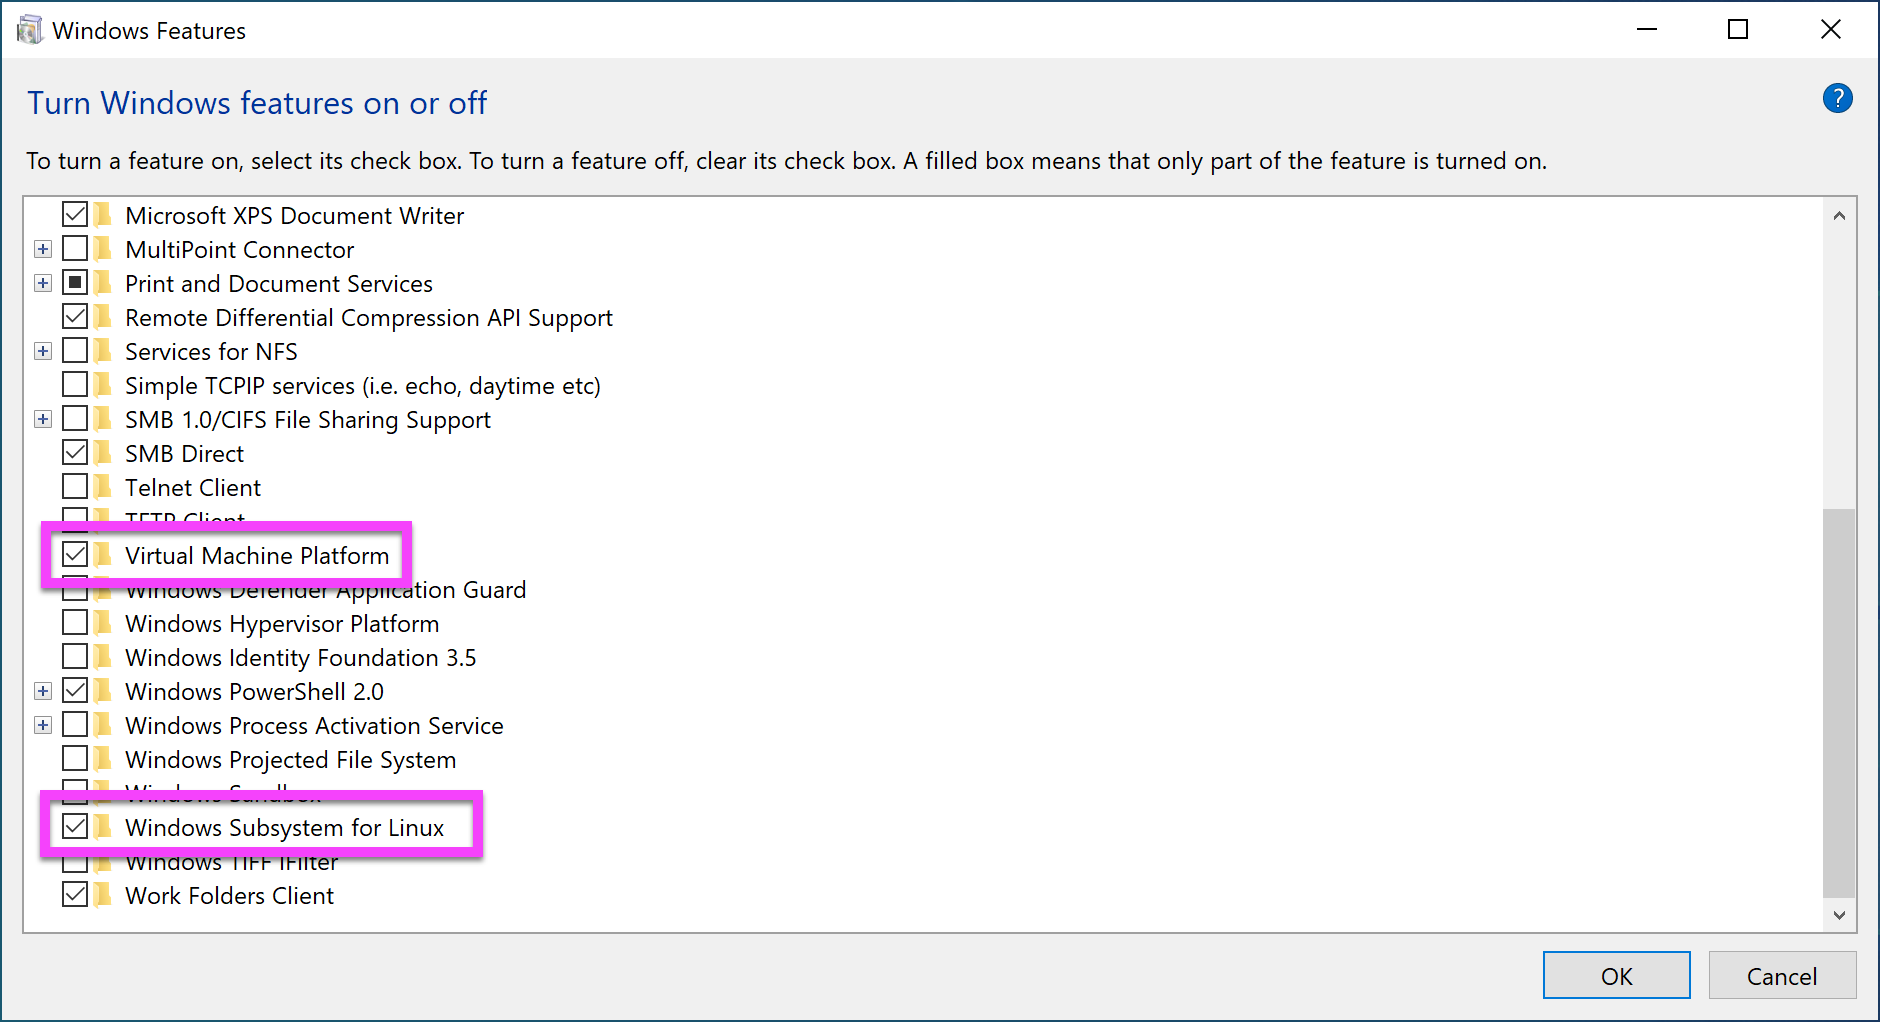
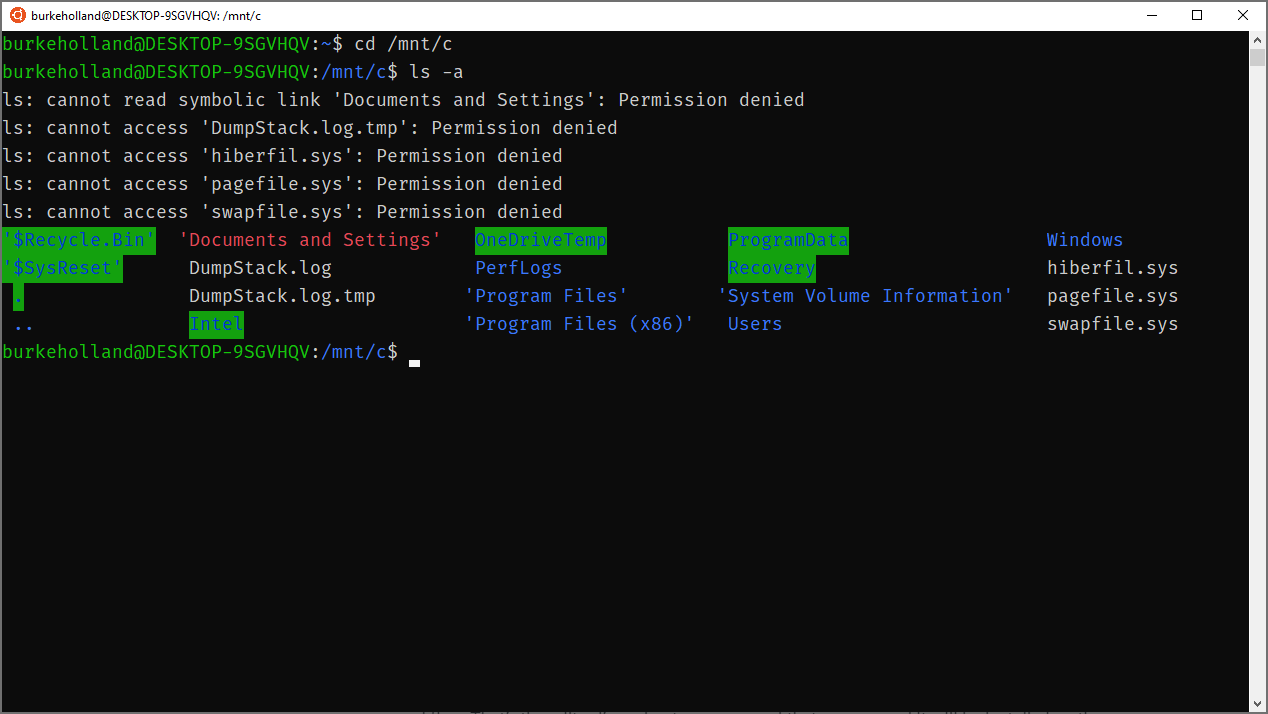
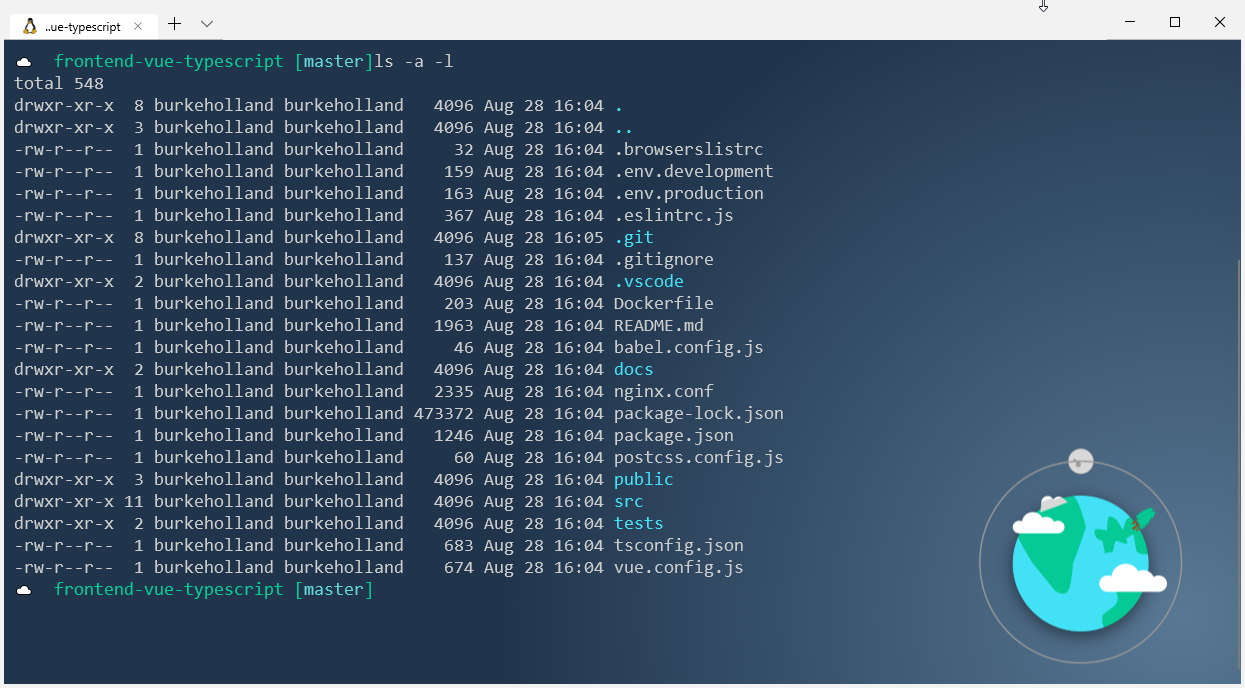
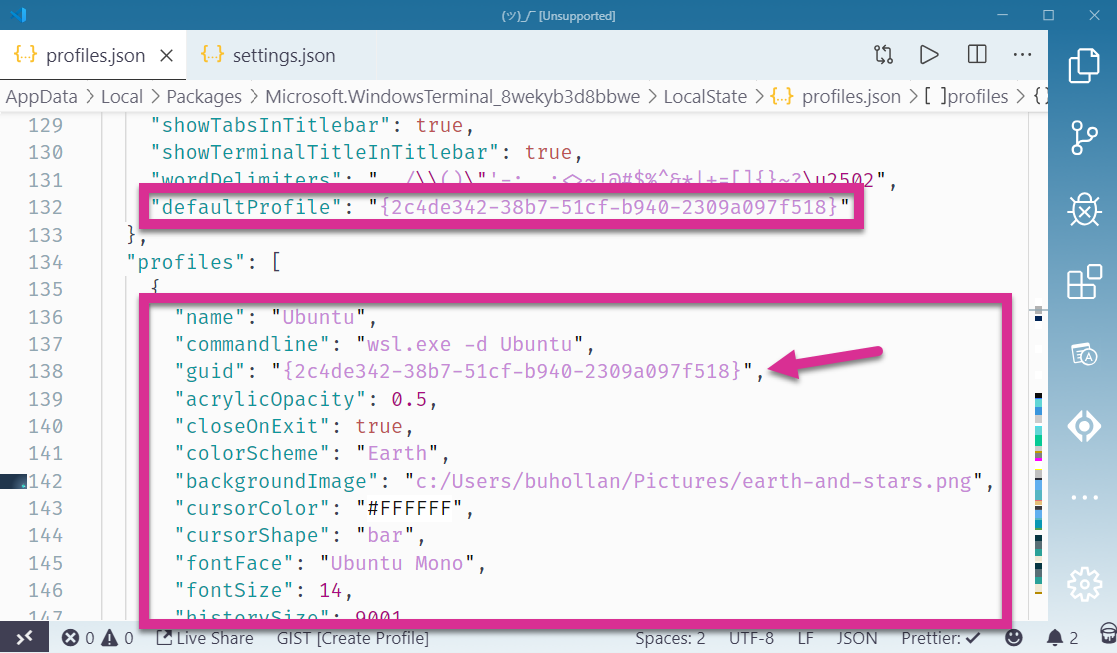
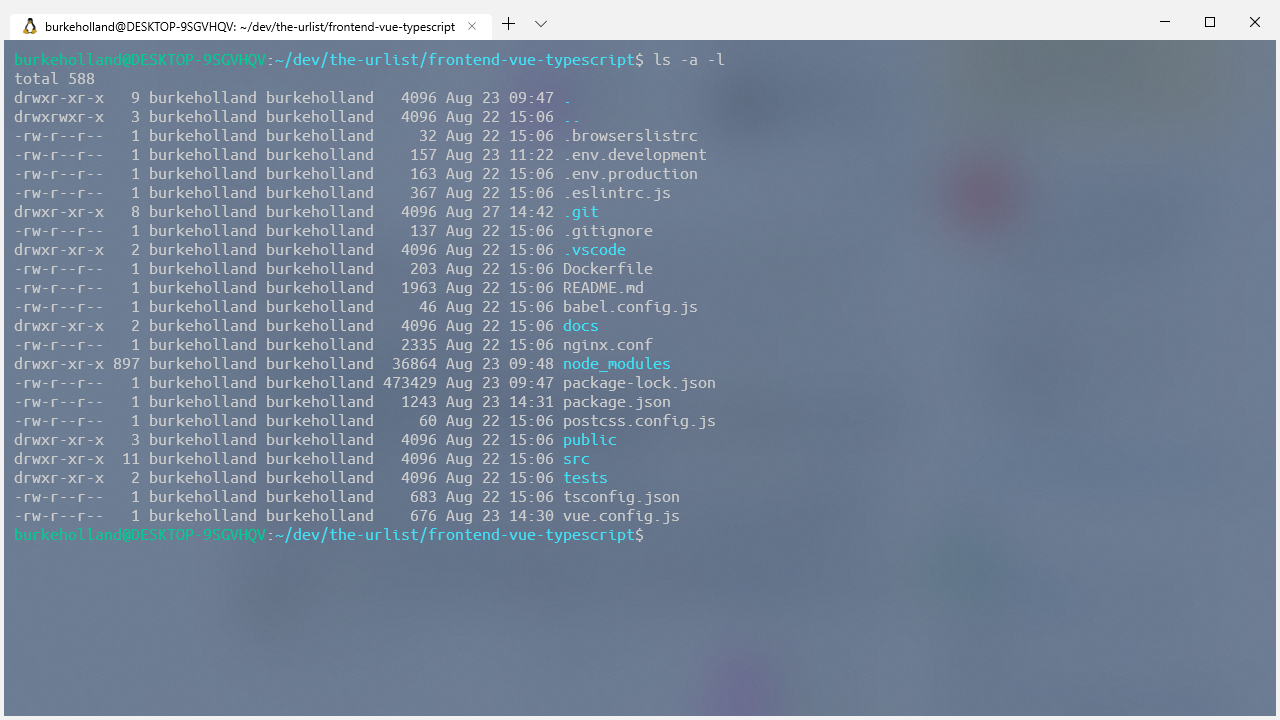
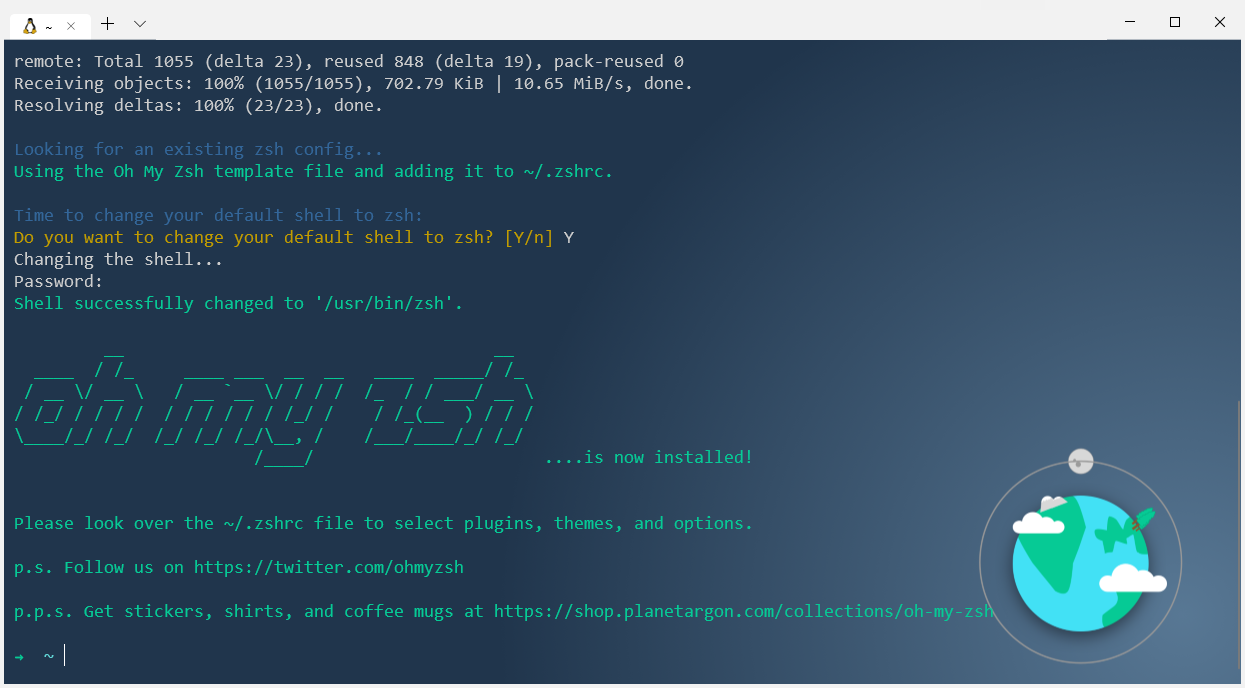
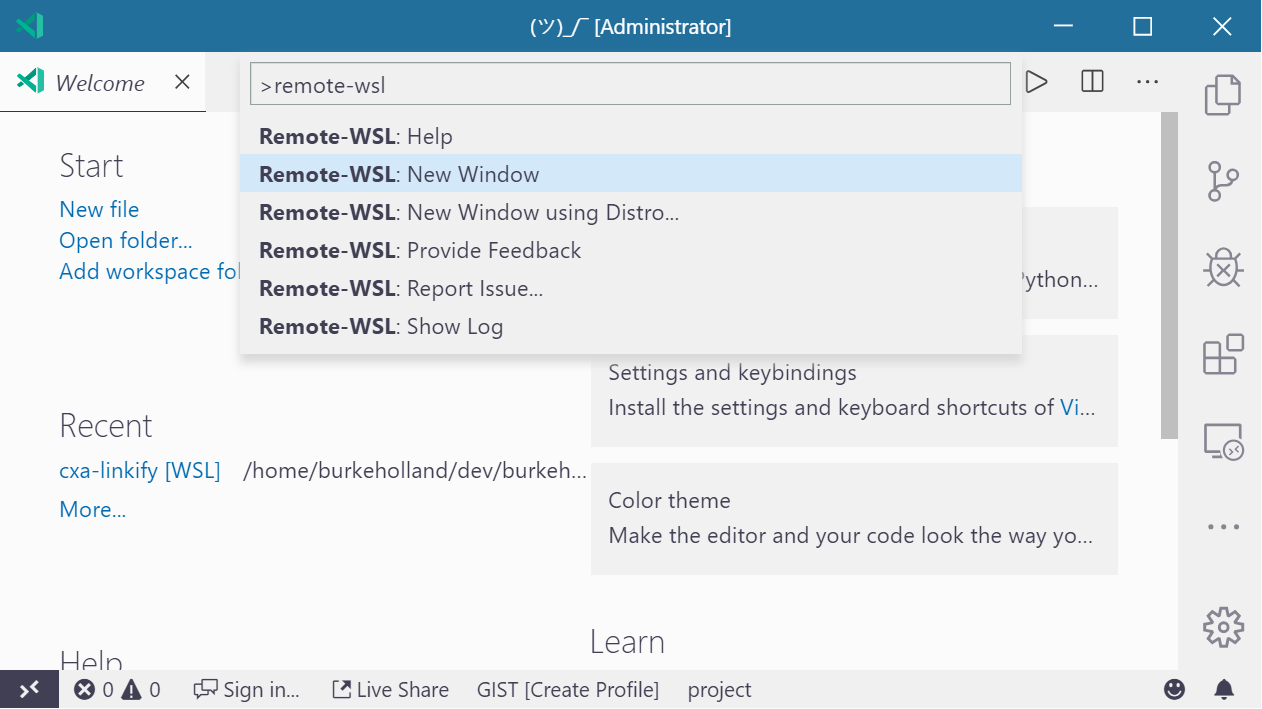
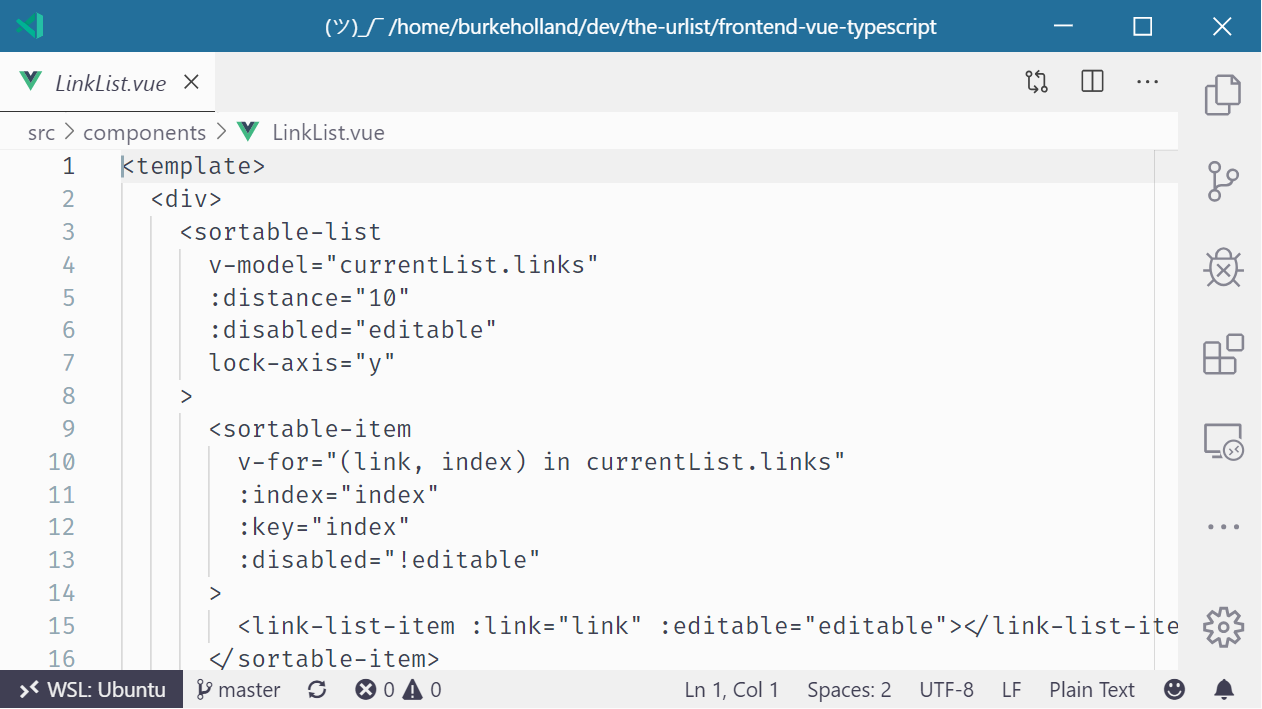
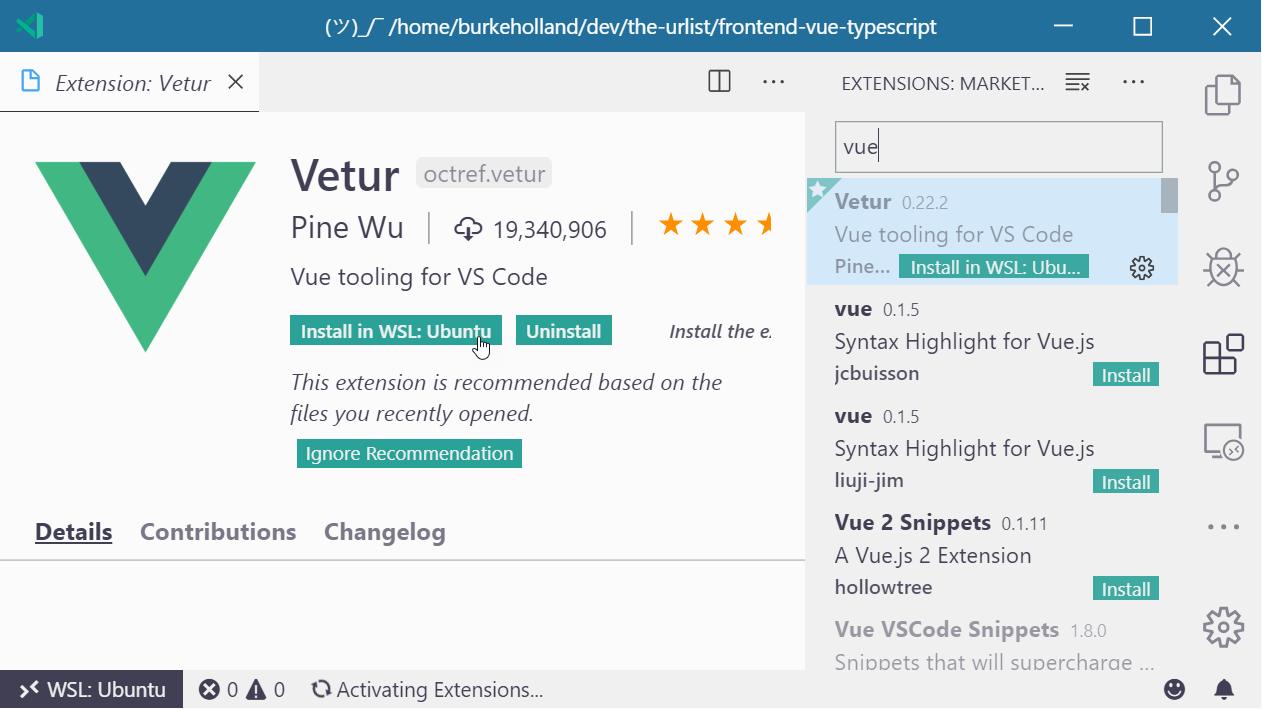
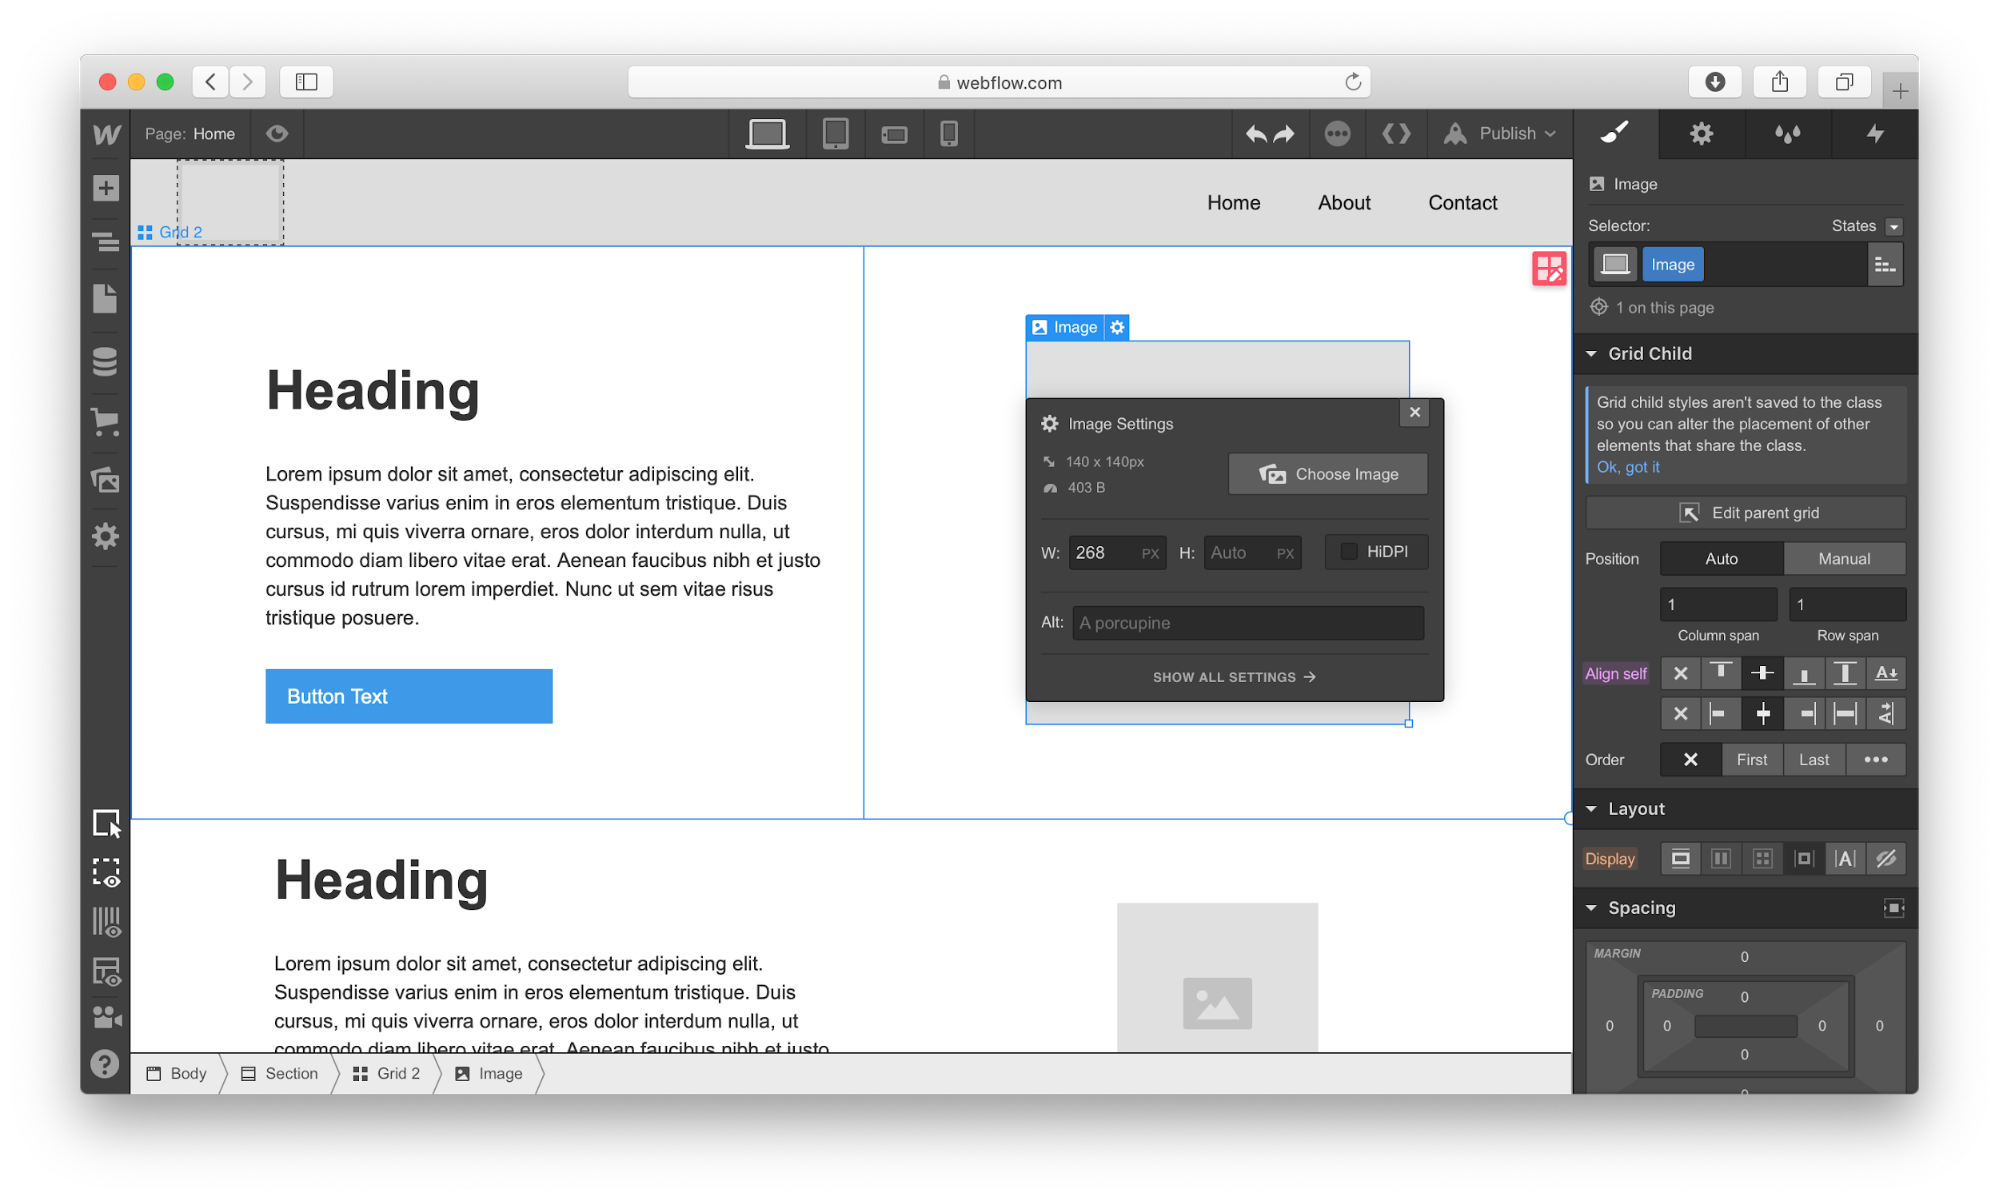
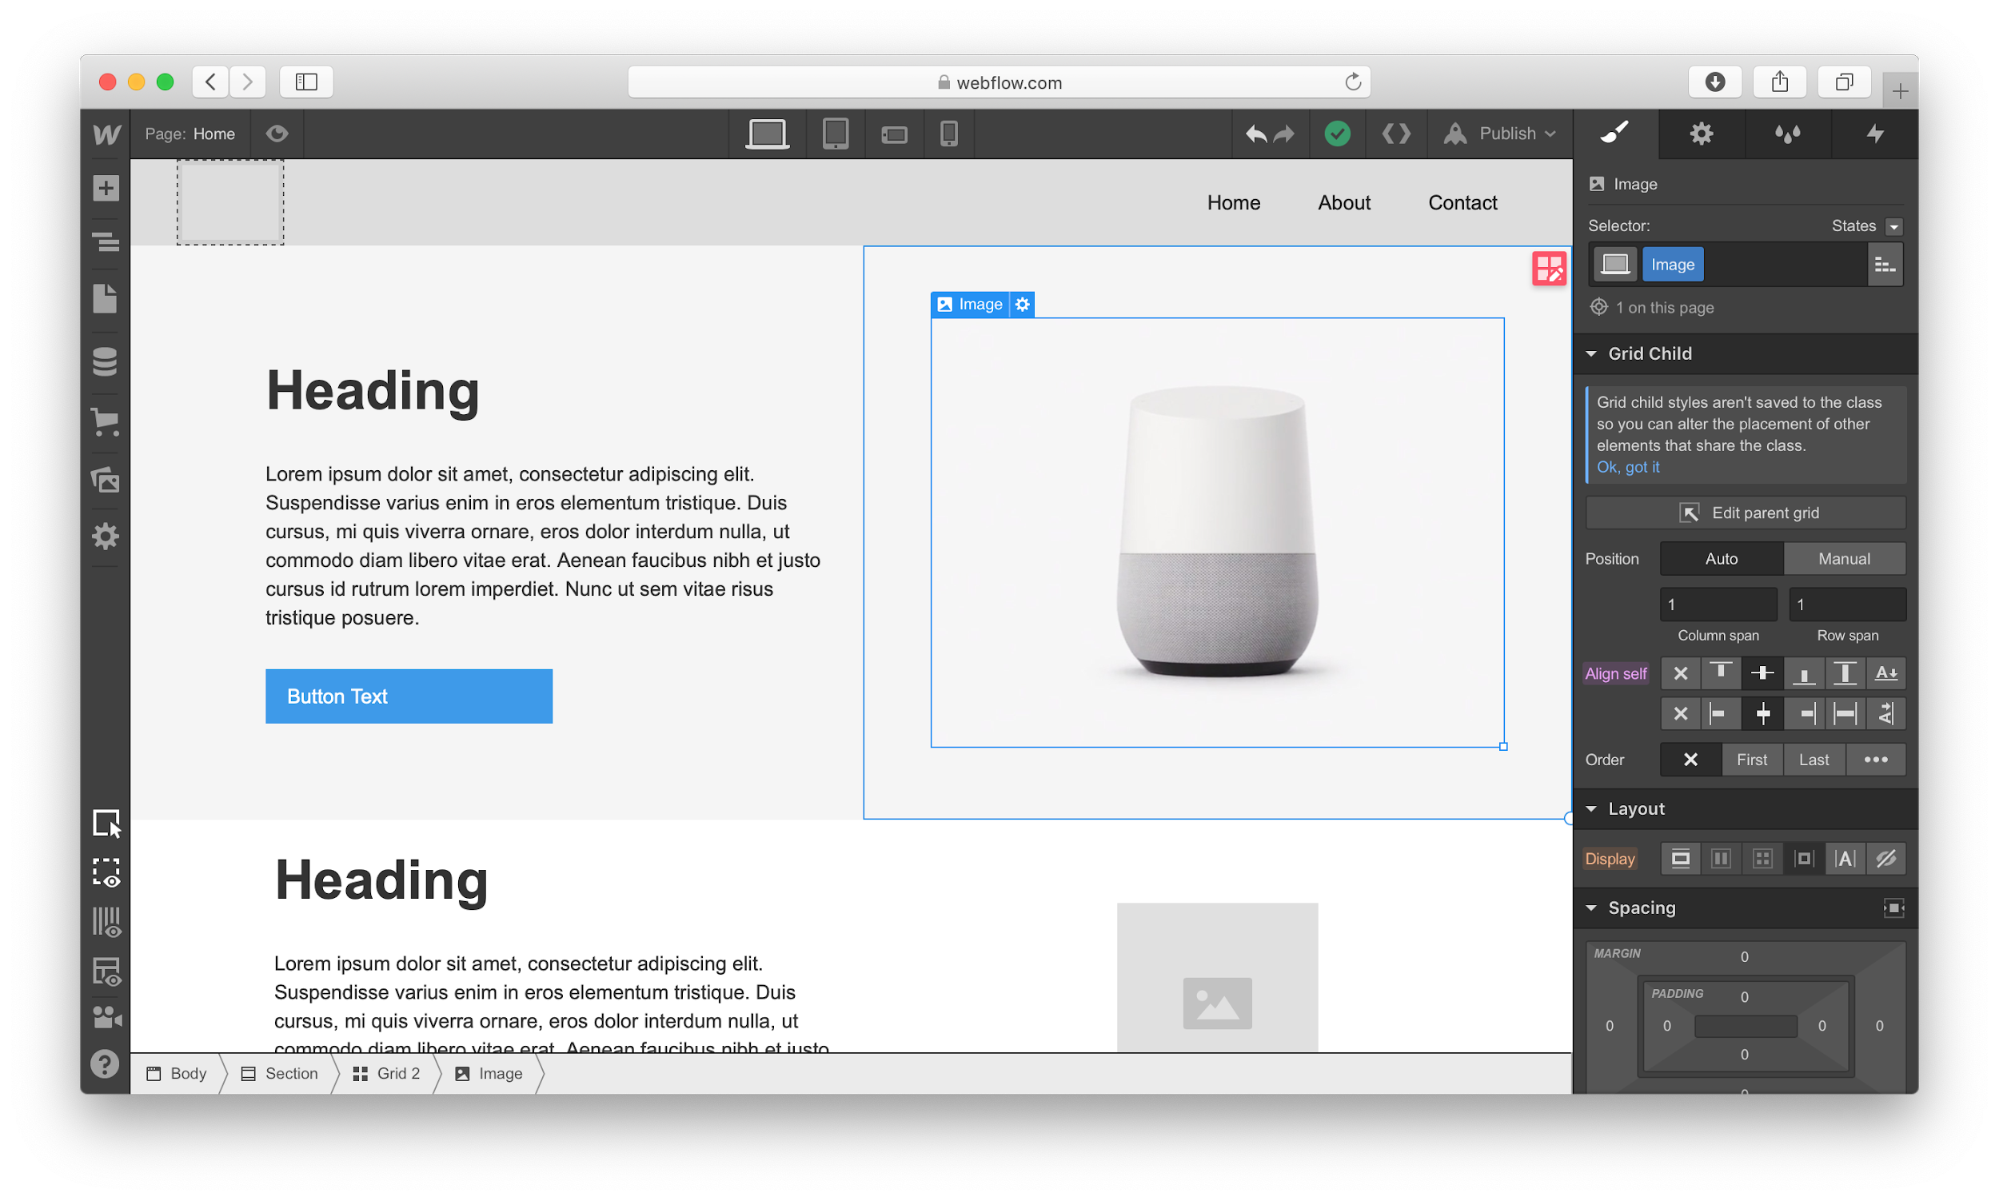
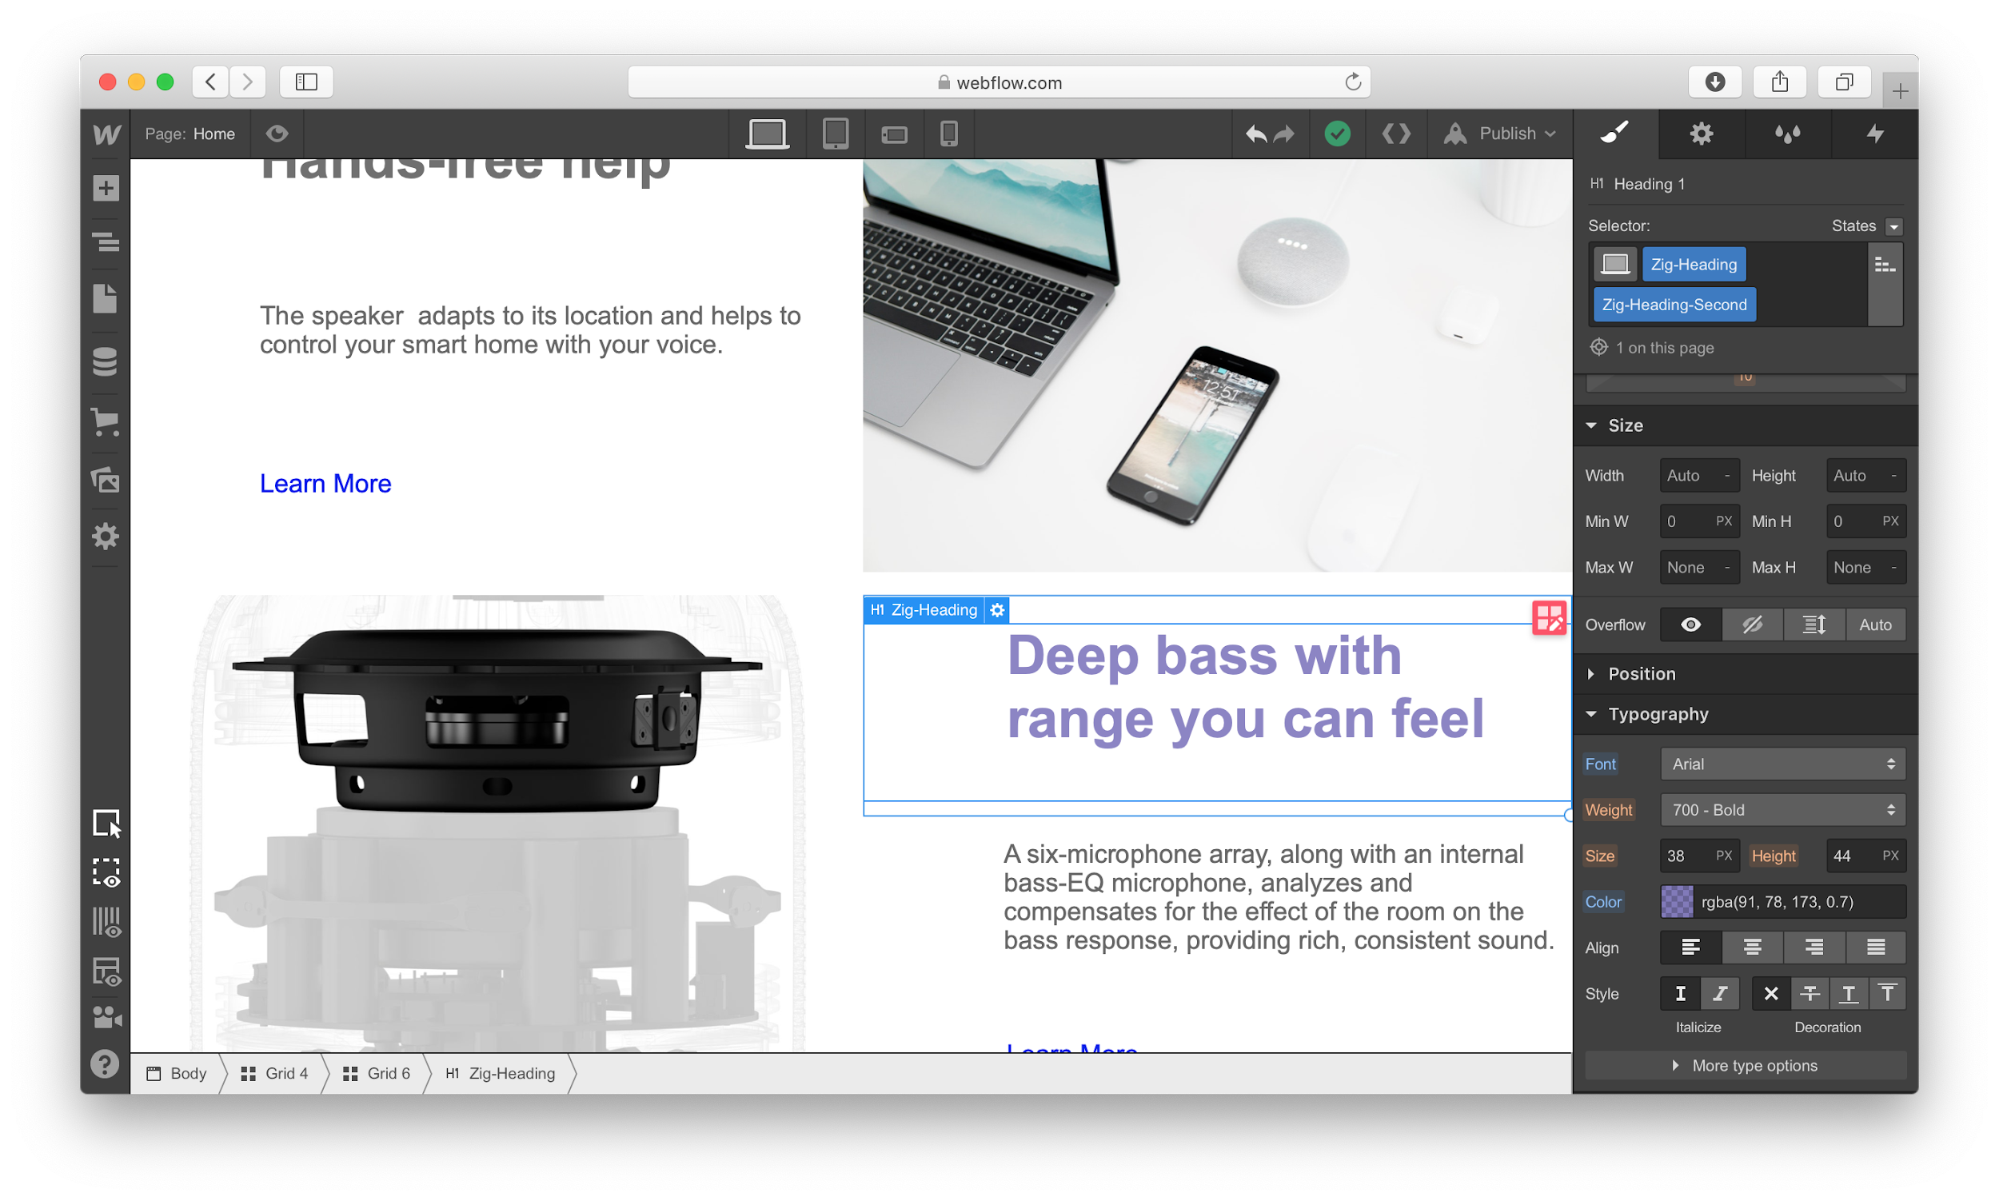